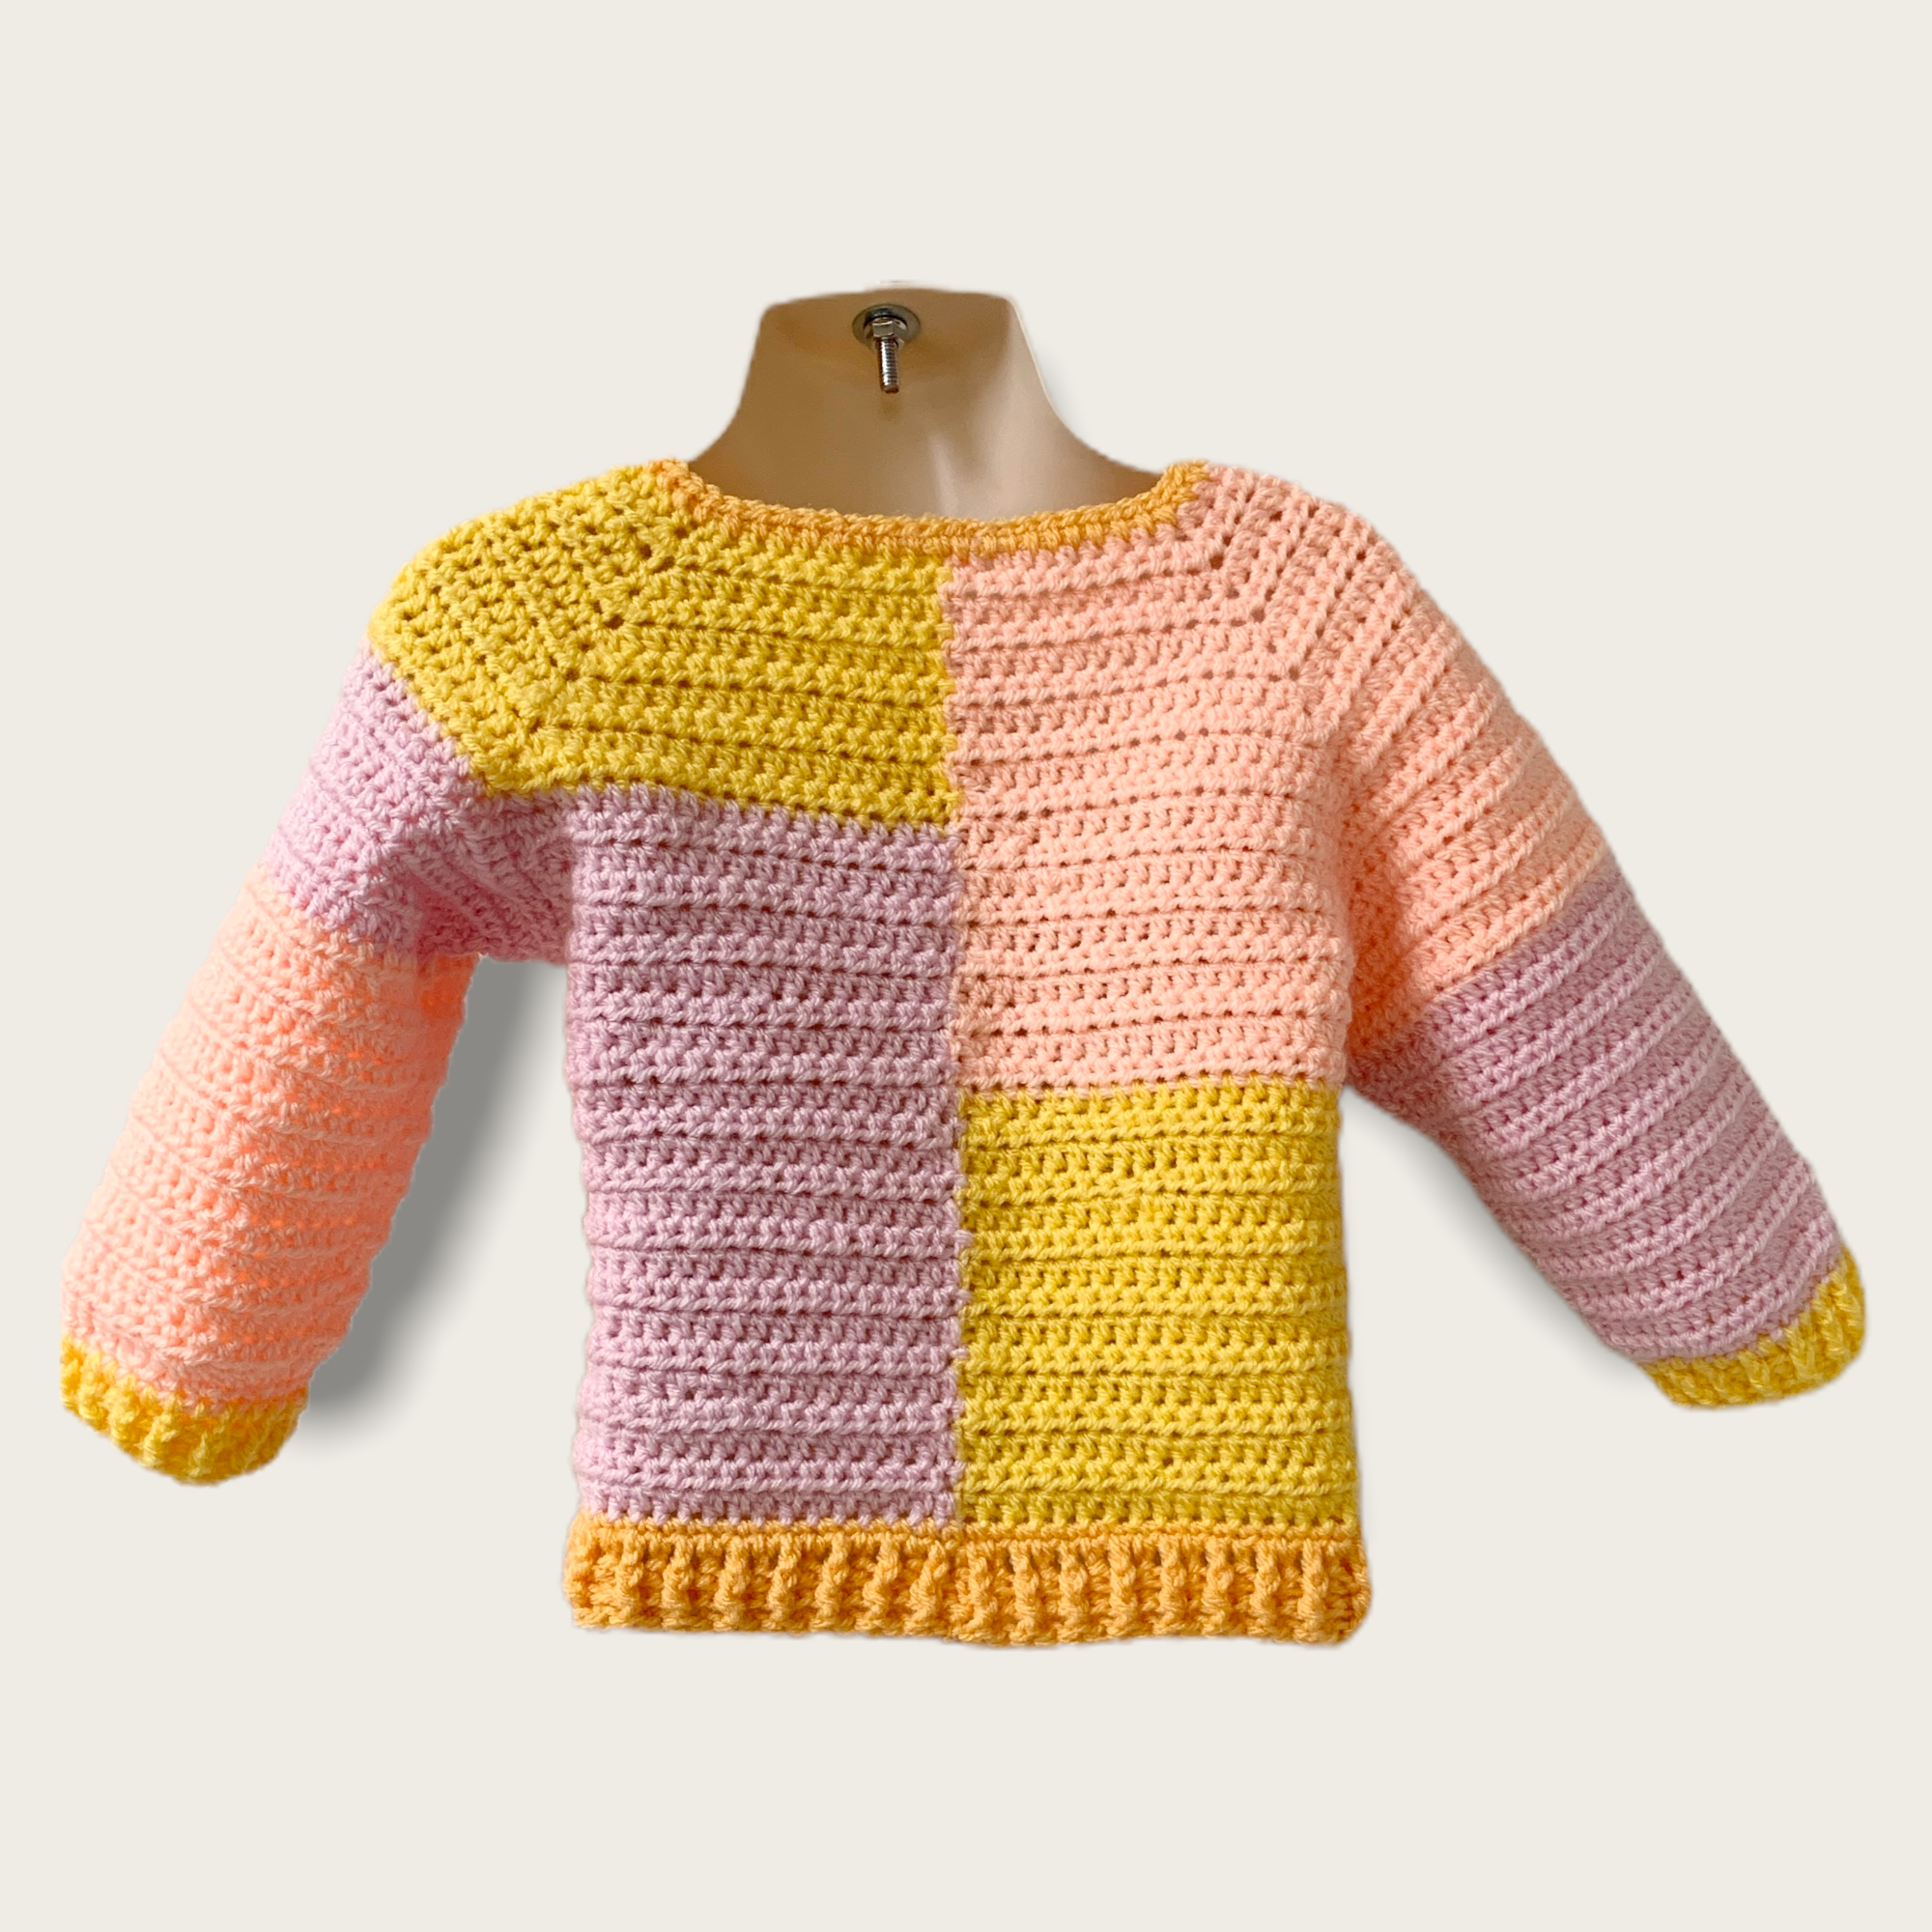
This garment was designed originally for an approximate age of 2 years (version B below). However, during the process of development and testing, it’s also been worked up in two additional sizes in different gauges, as shown below.
Sample Sizes Created to Date
| Version | Approx Age | Yarn | Hook | Sample Variations |
| A | 18 months | DK yarn, Weight 3 | 4.5 mm | Yarn C used for wrist ribbing rather than D. Yardage reflects this change. |
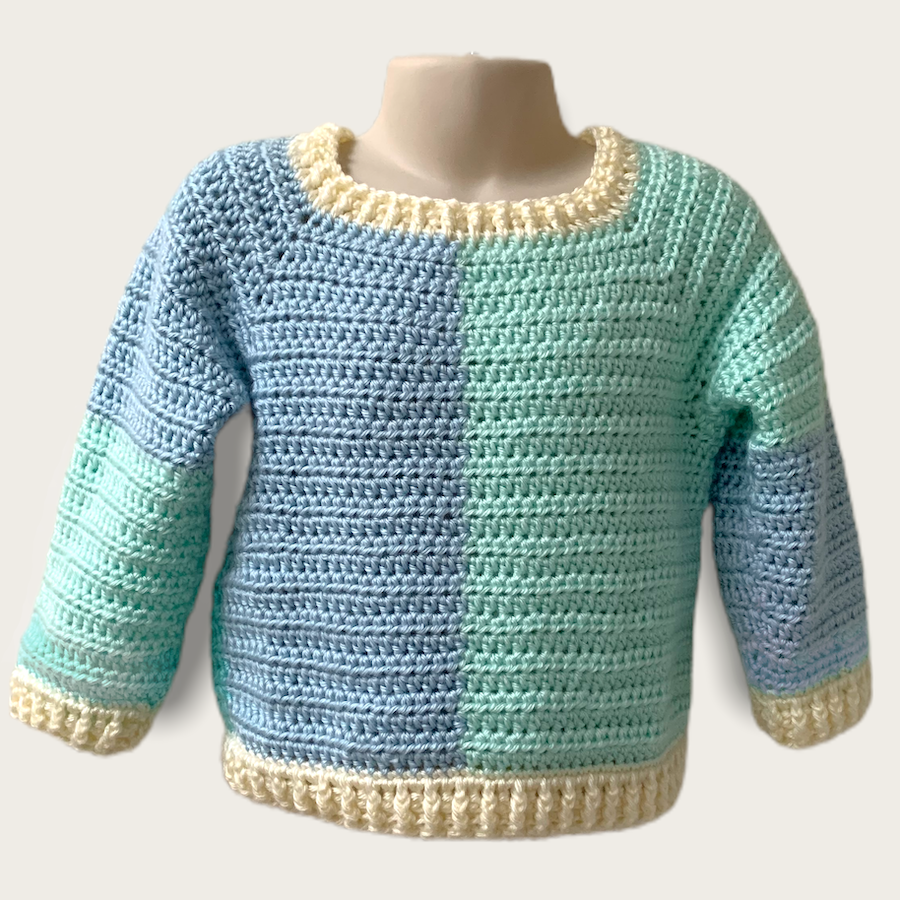
| B | 2 years | Aran yarn, Weight 4 | 5.5 mm | N/A |
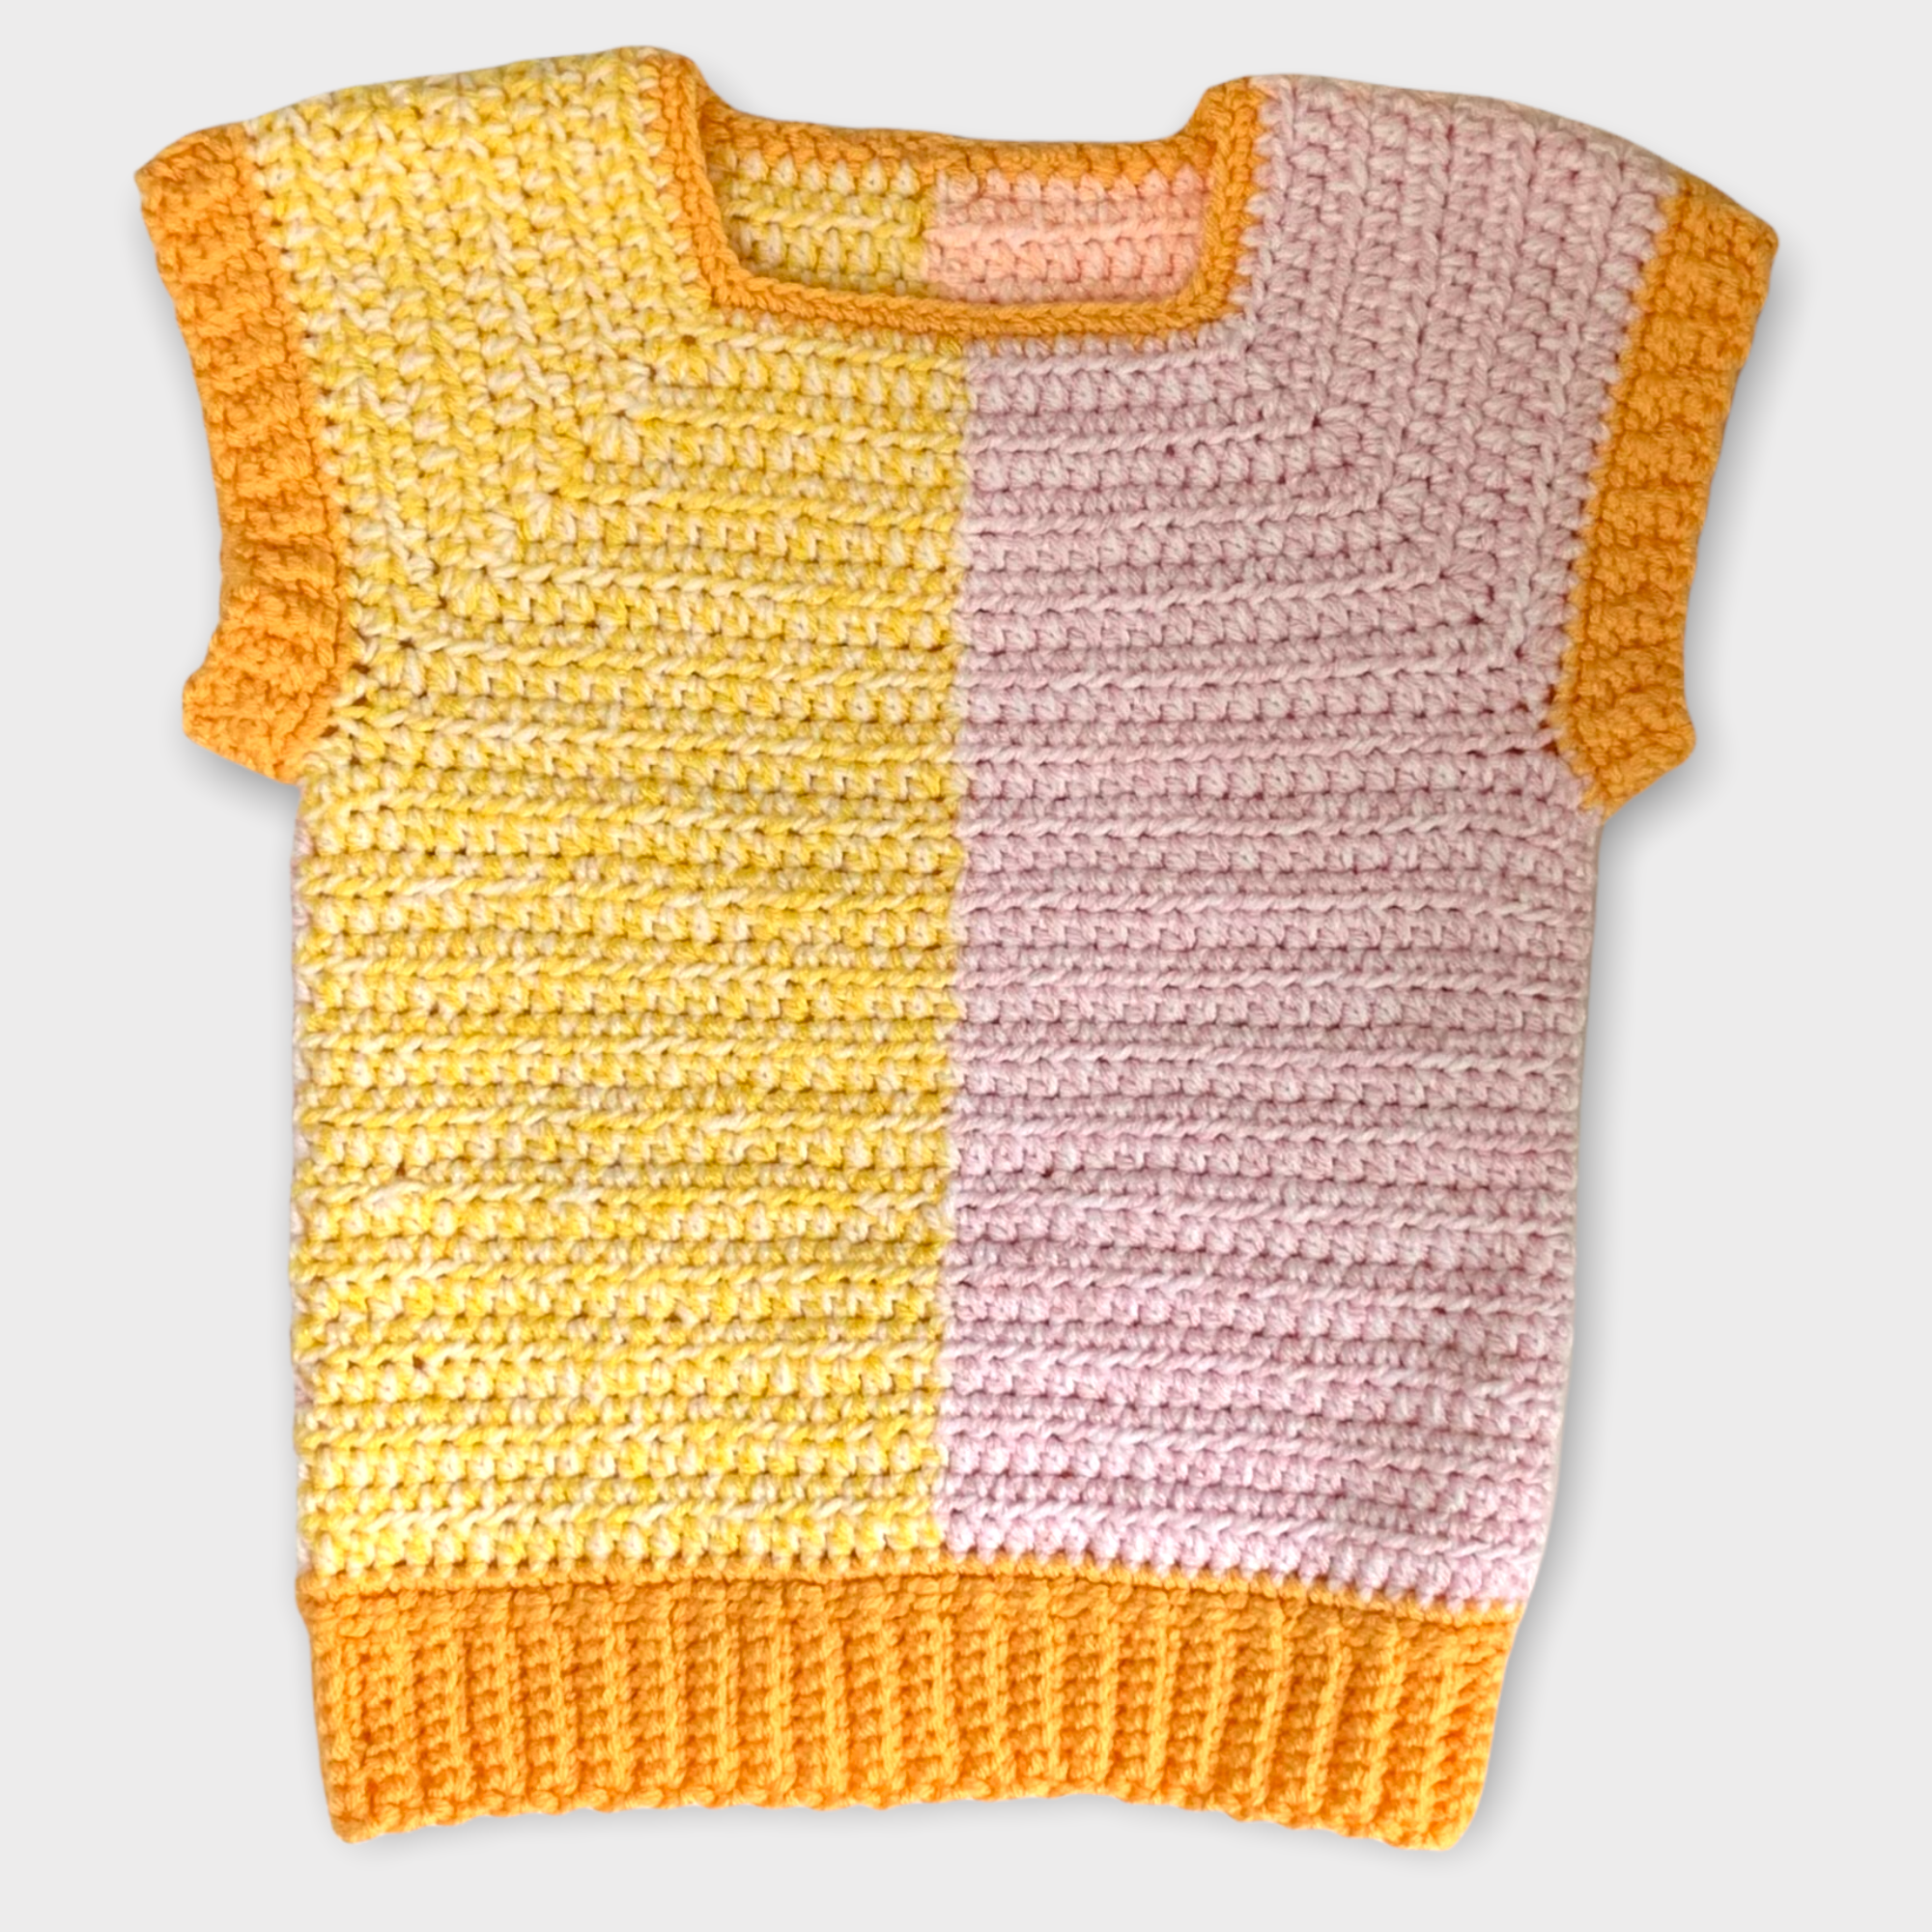
| C | 4 years | DK yarn held double | 6.00 mm | Garment is made longer. Sleeves are omitted. Armholes and hem are finished with scblo ribbing. |
Finished Measurements
| Version A | Version B | Version C | ||||
| Neck opening (width) | 10.5 cms | 11.5 cms | 12 cms | |||
| Chest (laid flat) | 28.5 cms | 32 cms | 34.5 cms | |||
| Armhole depth | 13.5 cms | 15.5 cms | 16.5 cms | |||
| Sleeve length from underarm | 21.5 cms | 23.5 cms | N/A | |||
| Garment length from top shoulder | 32 cms | 33 cms | 45 cms | |||
| Garment length from back neck | 29.5 cms | 31 cms | 41 cms | |||
| All measurements are approximate |
Materials
- Crochet hook (see table above)
- Yarn (see tables above and below)
- Stitch Markers
- Tapestry Needle for weaving in ends
- Scissors
- Tape measure or ruler.
Yarn colours used in these samples are:
| Version A | Version B | Version C |
| Stylecraft Special DK A Powder Pink (1843) B Apricot (1026) C Citron (2198) D Saffron (1081) | Caron Simply Soft Aran A Soft Green 9739 B Soft Blue 9712) C Robin’s Egg (9780) D Off White (9702) | Stylecraft Special DK held double with white for all colours except yarn D (Saffron). Colours as per Version A with the addition of White used throughout except for ribbing and neck edging. |
Skill Level
The pattern is designed with the intermediate crocheter or experienced beginner in mind. It requires confidence with working in the round, frequent colour changes and using multiple yarns at the same time, knowledge of increases and decreases, and creating ribbing with front post and and back post double crochet.
Yardage
All figures are approximate.
Please note that these are estimates, calculated from the weight of the finished garments, and the weight of yarn remaining in each skein. I try to be as accurate as I can, but it’s probably best to have more than needed, just to be on the safe side.
| Version A | Version B | Version C |
| Stylecraft Special DK Powder Pink 65g Apricot 55g Citron 20g Saffron 15g | Caron Simply Soft Aran Soft Green 100g Soft Blue 110g Robin’s Egg 25g Off white 45g | Stylecraft Special DK (held double) Yardage TBC. Note total garment weight is c230g. Thus total yarn is estimated c 7.7oz / 646m / 708 yds. |
Abbreviations
These notes use US terminology
| BPdc | back post double crochet |
| FPdc | front post double crochet |
| CB | Centre Back – where you will be joining rounds. |
| CF | Centre Front – where you will be changing colours. |
| ch | chain(s) |
| dc | double crochet |
| hdc | half double crochet |
| R[#] | Round [#] or Row [#] |
| rem | remaining |
| rep | repeat |
| rnd(s) | round(s) |
| RS | Right side of garment (ie the outside when worn) |
| WS | wrong side (ie the inside of the garment when worn) |
| sc | single crochet |
| scblo | single crochet in back loop only |
| sk | skip |
| sl st | slip stitch |
| SM(s) | stitch marker(s) |
| sp | space |
| st(s) | stitch(es) |
| Work [#]tog | work [#] stitches together |
Gauge
10 cms x 10 cms (4″ x 4″) of hdc taken from finished garment:
| Version A | Version B | Version C |
| 15 sts x 12 rows | 14 sts x 11 rows | 12 sts x 10 rows |
Pattern Notes
- The body of the sweater is worked in one piece from the top down with a square raglan yoke where increases are added at each corner. Some additional rows are added to the back side only, before dividing for sleeves. Ribbing is added at the bottom. The sleeves are then added on either side, worked in the round, with ribbing added at the end. Finally the neck is finished.
- When changing colour, pull through with the new colour on the final step of the last stitch of the old colour, dropping the old colour to the WS to be picked up again later. Continue working with the new colour. At times you will need separate sources of yarn. You can work from the opposite end of your skein, or divide your skeins into two sections before you start.
- Before beginning, it may be helpful to read through the entire pattern, highlight instructions for your chosen size, annotate with your chosen colours, and prepare yarns.
- Ch 1 at beginning of rnd does not count as a stitch.
- This garment requires frequent colour changes, with yarns being dropped to the Wrong Side (inside) of the work. To keep track of the Right Side (RS), it may be useful to place a stitch marker on the RS at an early stage.
- When fastening off, be sure to leave a tail long enough to weave in later.
Directions
Foundation chain
Versions A & C only: With specified hook and yarn D, ch 56, sl st to join ensuring no twists. [56 ch]
Foundation Row: Ch 1. Work 1 sc into the next ch and place SM into the top of this sc. Work 1 sc into ea next ch around, ending with sc into the base of the ch 1 worked at beg of the rnd. Sl st to first sc to join, fasten off D. Join B. Place SMs as follows:
| 8 | 1 | 10 | 1 | 16 | 1 | 10 | 1 | 8 | =56 |
| #9 SM | #20 SM | #37 SM | # 48 SM | ||||||
| Back A | Corner | Shoulder A | Corner | Front | Corner | Shoulder B | Corner | Back B |
Version B only: With hook 5.5 mm and yarn D, ch 60, sl st to join ensuring no twists. [60 ch]
Foundation Row: Ch 1. Work 1 sc into the next ch and place SM into the top of this sc. Work 1 sc into ea next ch around, ending with sc into the base of the ch 1 worked at beg of the rnd. Sl st to first sc to join. Fasten off D and join yarn B. Place SMs as follows:
| 9 | 1 | 10 | 1 | 18 | 1 | 10 | 1 | 8 | = 60 |
| #10 SM | #21 SM | #40 SM | # 51 SM | ||||||
| Back A | Corner | Shoulder A | Corner | Front | Corner | Shoulder B | Corner | Back B |
R1: (Versions A & C only) (RS facing as you work.) With B, Ch 1, 1 hdc in the same st, 1 hdc in next 8 chs, 3hdc in next ch [first corner created], move up SM to 2nd of 3 sts just worked, 1 hdc in next 10 ch, 3hdc in next ch [second corner created], move up SM to 2nd of 3 sts just worked, 1 hdc in next 8 chs, change to A and drop yarn B to the WS of work [CF colour change completed]. With A, 1 hdc in next 8 ch, 3hdc in next ch [third corner created], move up SM to 2nd of 3 sts just worked, 1 hdc in next 7 ch, change to yarn C and drop A to WS of work [shoulder colour change completed]. With C, 1 hdc in next 3 ch, 3hdc in next ch [fourth corner created], move up SM to 2nd of 3 sts just worked, 1 hdc in ea rem st of the rnd. Join with a sl st to the first hdc. Ch 1 and turn. [64 hdc]
R1: (Version B only) (RS facing as you work.) With B, Ch 1, 1 hdc in the same st, 1 hdc in next 9 chs, 3hdc in next ch [first corner created], move up SM to 2nd of 3 sts just worked, 1 hdc in next 10 ch, 3hdc in next ch [second corner created], move up SM to 2nd of 3 sts just worked, 1 hdc in next 9 chs, change to A and drop yarn B to the WS of work [CF colour change completed]. With A, 1 hdc in next 9 ch, 3hdc in next ch [third corner created], move up SM to 2nd of 3 sts just worked, 1 hdc in next 7 ch, change to yarn C and drop A to WS of work [shoulder colour change completed]. With C, 1 hdc in next 3 ch, 3hdc in next ch [fourth corner created], move up SM to 2nd of 3 sts just worked, 1 hdc in ea rem st of rnd. Join with a sl st to the first hdc. Ch 1 and turn. [68 hdc]
From now on we will always move up our SM to the second of the 3 hdc worked in each corner, and the marked stitch becomes the new corner into which we work our increases in each round.
R2: With C, 1 hdc in ea st to next SM, 3 hdc in this marked st, 1 hdc in ea st to shoulder colour change, change yarn to A and drop C to WS of work. With A, 1 hdc in ea st to next SM, 3 hdc in this marked st, 1 hdc in ea st to CF colour change, change to yarn B dropping A to WS of work. With B, 1 hdc in ea st to next SM, 3 hdc in this marked st, 1 hdc in ea st to next SM, 3 hdc in this marked st, 1 hdc in ea rem st of the rnd. Join with a sl st to the first hdc. Ch 1, turn.
R3-R10: Rep previous rnds, changing colours at CF and shoulder, and increasing at each corner. Join with sl st to first hdc. Ch 1 and turn.
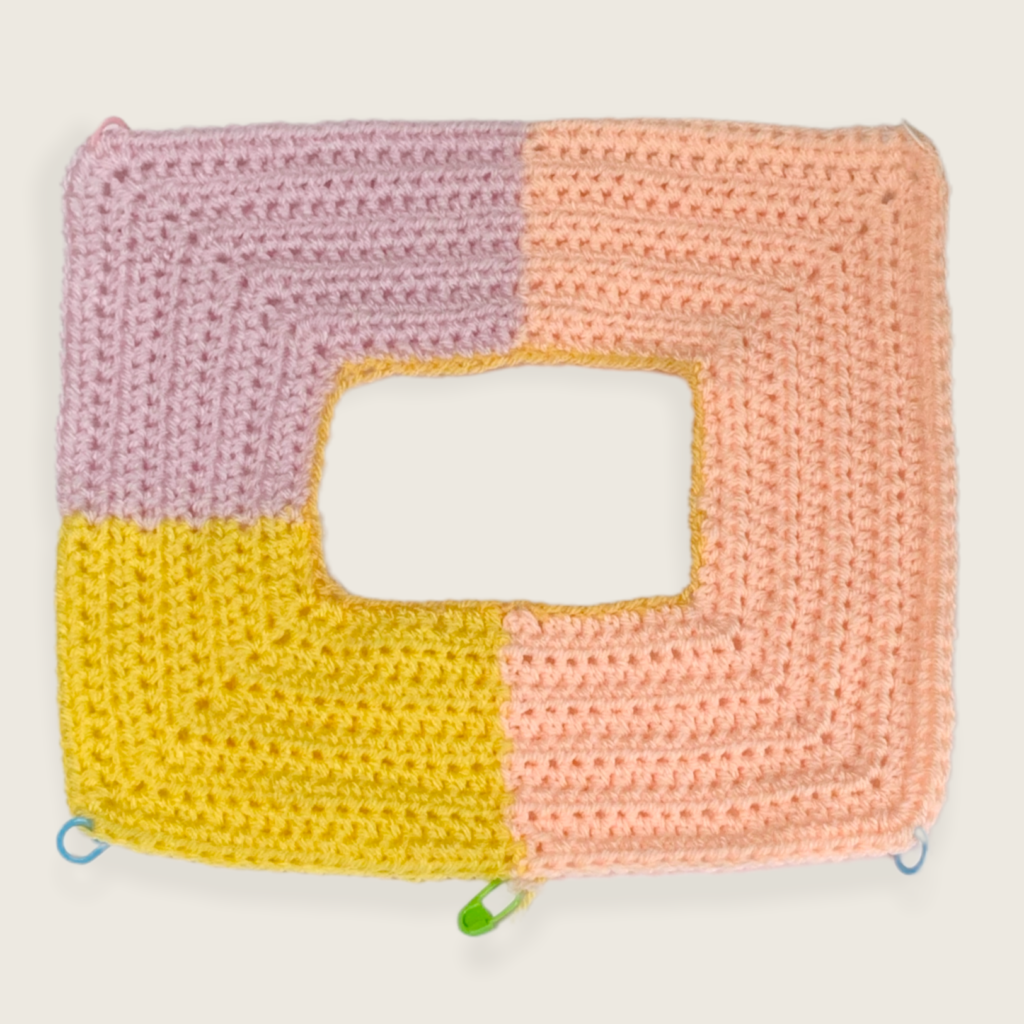
Once R10 is complete, fasten off yarn C at shoulder. Do not fasten off B or A. Secure active stitch of Yarn B using SM.
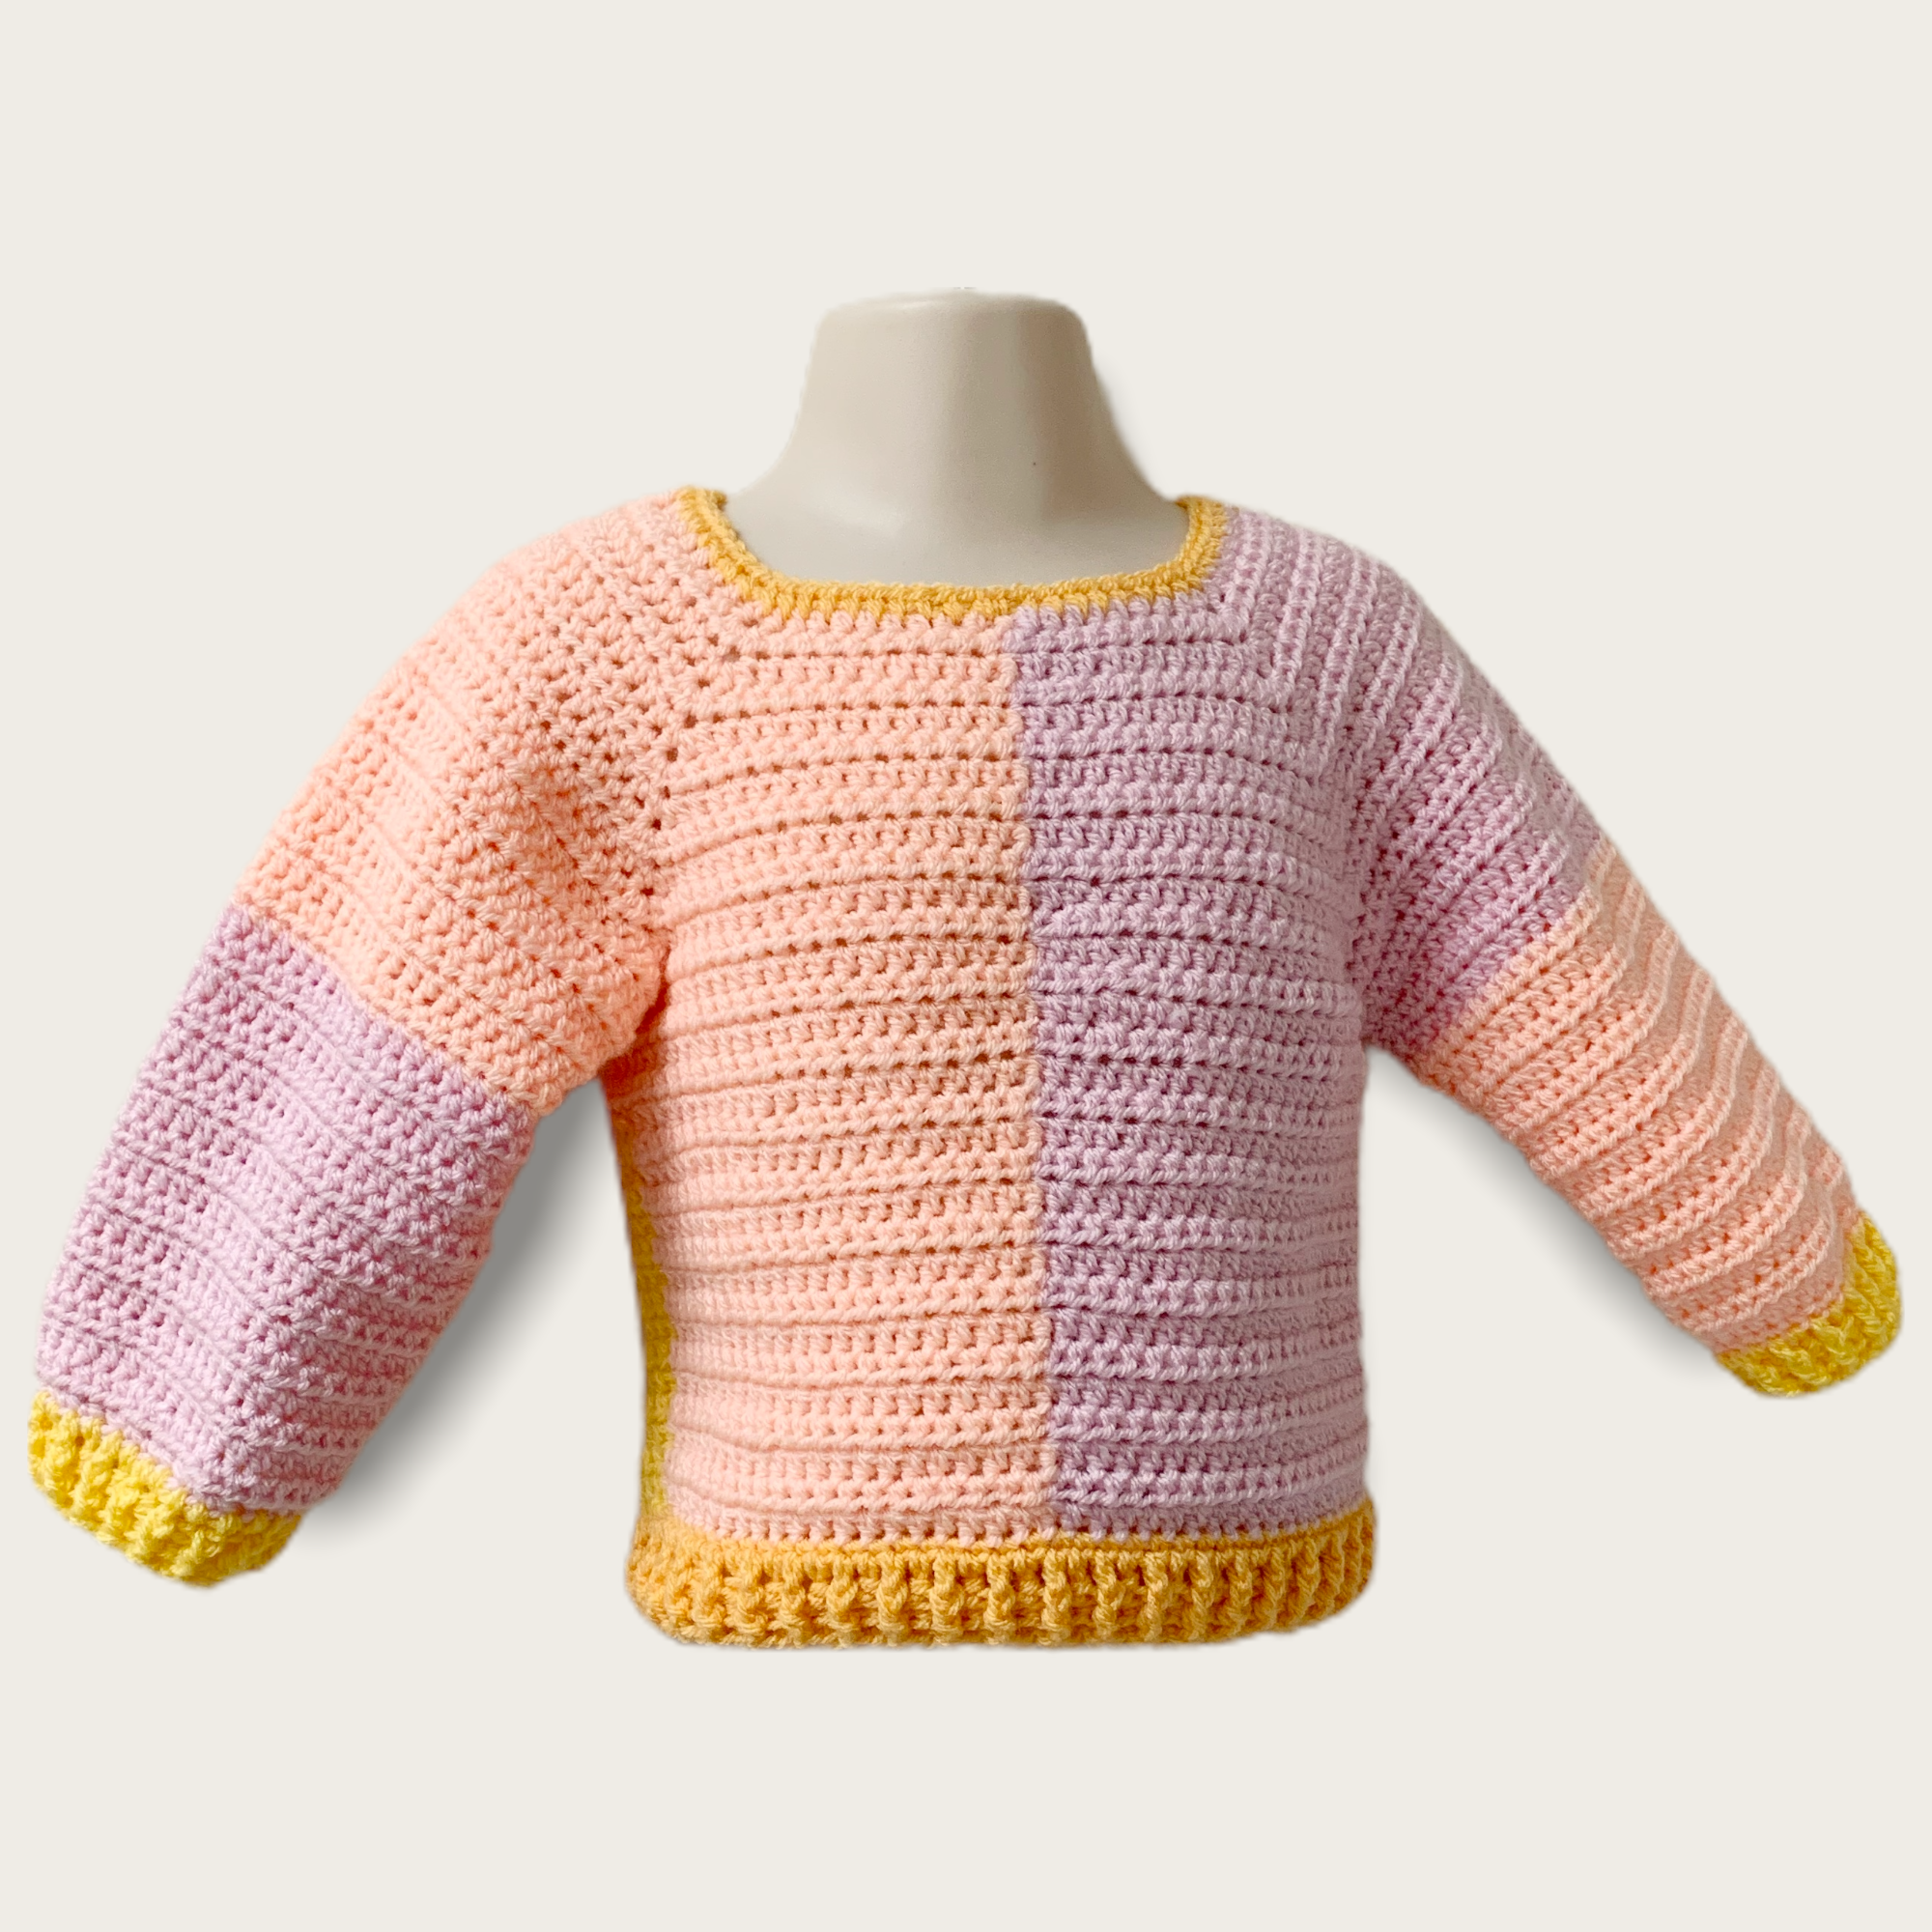
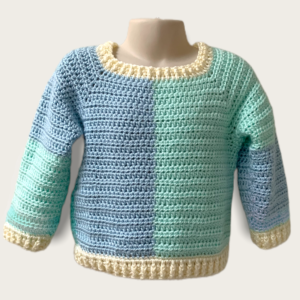
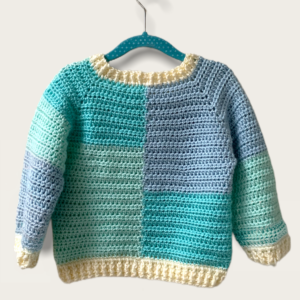
At this point, your garment will be looking similar to this:
Extra rows to lift back
💡 N.B. These extra rows lift the back of the garment which serves two purposes. It more accurately follows natural body contours, so helping to keep the wearer’s neck warm, and makes the front and back of the garment easier to identify.
R10.1 Ensure sts are pointing in the direction as though you have just turned your work. Rejoin yarn C at appropriate back corner, working 1 hdc in ea st along to final st before CB. Complete this hdc in yarn C by pulling through with loop of yarn B secured earlier. Drop C to WS. With B, continue with 1 hdc in ea st to next corner. Ch 1 and turn.
R10.2: Work back along the back section only, changing colour at CB. After completing R10.2 fasten off C at back corner. Join A at corner from a separate source, ch 1 and turn.
R10.3: With A, work I hdc in ea st along to CB, change to B and continue with 1 hdc in ea st to next corner. Ch 1 and turn.
R10.4: Work back along the back section only, changing colour at CB. After completing R10.4 fasten off A at back corner.
Proceed to Divide for Sleeves & Body.
Divide for Sleeves & Body
R11 (Versions A & C only): Ensure sts are pointing in the direction as though you have just turned your work. Pull up a loop with yarn B at CB. Work 1 hdc in ea st to first corner. In the corner st work 1 hdc and ch 5. Sk all sts along the shoulder section and work 1 hdc into the next corner, thus joining the two corners together to create first arm opening. Now continue working 1 hdc in each st to CF colour change. Change to A and work 1 hdc in each rem st of front section until the next corner. Work 1 hdc into the corner st and ch 5. Sk all sts along the second shoulder section and work 1 hdc into the final corner, creating second arm opening. Continue working 1 hdc in ea rem st of back section and sl st to join. Ch 1 and turn.
R11 (Version B only): Ensure sts are pointing in the direction as though you have just turned your work. Pull up a loop with yarn B at CB. Work 1 hdc in ea st to first corner. In the corner st work 1 hdc and ch 4. Sk all sts along the shoulder section and work 1 hdc into the next corner, thus joining the two corners together to create first arm opening. Now continue working 1 hdc in each st to CF colour change. Change to A and work 1 hdc in each rem st of front section until the next corner. Work 1 hdc into the corner st and ch 4. Sk all sts along the second shoulder section and work 1 hdc into the final corner, creating second arm opening. Continue working 1 hdc in ea rem st of back section and sl st to join. Ch 1 and turn.
R12: With A, 1 hdc in ea st around, incl the underarm chs, to CF colour change. Change to B and work 1 hdc in ea rem st of the rnd. Join with sl st to first hdc, ch 1, turn.
Next Rnds (Version C only) The sample for version C differs from this point. Pls refer to section below headed Additional Notes on Version C.
R13-16 (Versions A & B only): Continue in the same manner as R12, working 1 hdc in ea st around, changing colours at CF and turning at CB. At end R16 sl st to join and fasten off B. Turn.
R17: Join C at CB. With C, Ch 1, 1 hdc in the same st, 1 hdc in ea next st to underarm midpoint, rejoin B and change to B. With B, 1 hdc in ea st to CF and change to A. With A, 1 hdc in ea rem st of the rnd. Join with sl st to first hdc. Ch 1, turn.
Next Rnds:
Version A only: Complete a further 14 rounds in this manner until work measures approx 26.5 cms from back neck, or desired length. Fasten off all yarns.
Version B only: Complete a further 13 rounds in this manner until work measures approx 27.5 cms from back neck, or desired length. Fasten off all yarns.
Version C only: Complete a further 14 rounds in this manner until work measures approx 36.5 cms from back neck, or desired length. Fasten off all yarns.
Bottom Ribbing (Sizes A & B only)
With front RS facing, lay garment flat and place SMs at both sides (directly under arms).
R1: Working from the RS (outside) of the garment, join D at CB and ch 1. Work 1 sc into the next st and place SM into the top of this sc. Work 1 sc into ea next st until SM, sc2tog, work 1 sc in each st to next SM, sc2tog, sc in ea rem st, ending with sc into the base of ch1 worked at beg of the rnd. Check that you have an even number of sts and adjust if necessary. Join with sl st to first sc. Ch 1, turn.
R2: 1 dc into ea st around, joining with sl st to first dc. Check again for an even number of sts and adjust if necessary. Ch 1, turn.
R3: FPdc around the next dc, BPdc around next dc, FPdc around next dc, repeating this sequence to last st, continuing to alternate FPdc and BPdc in rem sts of the rnd. You should end with a BPdc. Join with sl st to first dc. Ch 1, do not turn.
R4: FPdc into FPdc from previous round, BPdc into BPdc from previous rnd, continuing to alternate FPdc and BPdc in rem sts of the rnd, ensuring posts are always pushed in the same direction as the previous row to create ribbing effect. Join with sl st to first dc and fasten off D.
Left Sleeve (as worn)
With front RS of garment facing, begin with right-hand sleeve, the wearer’s left. Before beginning, ensure sts are pointing in the direction as though you have just turned your work.
R1: Join A to middle underarm ch of wearer’s left. Work 1 hdc in ea st around, incl the underarm chs, and working evenly along ends of rows created in Rnds 10.1 – 10.4.
💡 N.B. If work looks a little gappy in the underarm area, you can work hdc2tog to fill up any gaps without increasing the st count. Working 1 or 2 hdc2tog around the armhole can also help to reduce bulk in this area. (Note also: If the sleeves feel complicated, another approach is to work each sleeve flat – ie don’t join between rounds but simply ch1 and turn, then seam together after.)
Complete R1 by joining with sl st to first hdc. Ch 1, turn. Count and note your stitchcount so you can be sure to replicate this number on the other side.
R2: Immediately hdc2tog, 1 hdc in ea st around until 2 sts remain, hdc2tog. Join with sl st to first hdc. Ch 1, turn.
We are now going to dec by one st in every other row, and also alternate decreases between the beginnings and ends of rnds, in order to prevent the centre join going off-centre.
R3: 1 hdc in ea st around, join with sl st to first hdc, ch 1, turn.
R4: Immediately hdc2tog, 1 hdc in rem st around, join with sl st to first hdc, ch 1, turn.
R5: 1 hdc in ea st around, join with sl st to first hdc, ch 1, turn.
R6: 1 hdc in ea st around until 2 sts remain, hdc2tog, join with sl st to first hdc, ch 1, turn.
R7-8: Rep R3-4, finishing by joining B. Fasten off A, count sts to ensure equal number on the other side.
R9: With yarn B, rep R5-6.
Next Rnds:
Version A only: Continuing with yarn B, rep rnds 3-6 until you have worked a total of 24 rows for the sleeve, or until desired length. Fasten off B. Count sts.
Version B only: Continuing with yarn B, rep rnds 3-6 until you have worked a total of 25 rows for the sleeve, or until desired length. Fasten off B. Count sts.
Right Sleeve (as worn)
With front RS of garment facing, select the left-hand sleeve, which is the wearer’s right. Before beginning, ensure sts are pointing in the direction as though you have just turned your work.
R1: Join B to middle underarm ch. Work 1 hdc in ea st around, incl the underarm chs, and working evenly along ends of rows created in R10.1-10.4. Count sts to ensure they equal the number on the left sleeve.
R2: Immediately hdc2tog, 1 hdc in st around until 2 sts remain, hdc2tog. Join with sl st to first hdc. Ch 1, turn.
R3: 1 hdc in ea st around, join with sl st to first hdc, ch 1, turn.
R4: Immediately hdc2tog, 1 hdc in rem st around, join with sl st to first hdc, ch 1, turn.
R5: 1 hdc in ea st around, join with sl st to first hdc, ch 1, turn.
R6: 1 hdc in ea st around until 2 sts remain, hdc2tog, join with sl st to first hdc, ch 1, turn.
R7-8: Rep R3-4, finishing by pulling through with A. Fasten off B, count sts to ensure number is equal to the other side.
R9: With A, rep R5-6.
Next Rnds:
Version A only: Continuing with yarn C, rep rnds 3-6 until you have worked a total of 24 rows for the sleeve, or until desired length. Fasten off A. Count sts.
Version B only: Continuing with yarn C, rep rnds 3-6 until you have worked a total of 25 rows for the sleeve, or until desired length. Fasten off B. Count sts.
Sleeve Ribbing (Sizes A & B only)
Repeat for each arm.
Calculate number of decreases needed to reach a stitch count of 28 and place this number of SMs distributed equally around sleeve end. (Eg, if you now have have 32 sts, you need 4 decreases, so you’d place 4 SMs evenly around the sleeve end.)
R1: Working from the RS (outside) of the garment, join D at wrist underside centre and ch 1. Work 1 sc into the next hdc and place SM into the top of this sc. *Work 1 sc into ea next hdc until SM, sc2tog, 1 sc in each st to next SM, sc2tog. Rep from * until no SMs rem, 1 sc in ea rem hdc, ending with sc into the base of the ch 1 worked at beg of the rnd. Check that you have an even number of sts and adjust if necessary. Join with sl st to first sc. Ch 1, turn.
R2: 1 dc into ea sc around, joining with sl st to first dc. Check again for an even number of sts and adjust if necessary. Ch 1, turn.
R3: FPdc around the next dc, BPdc around next dc, FPdc around next dc, repeating this sequence to last st, continuing to alternate FPdc and BPdc in rem sts of the rnd. You should end with a BPdc. Join with sl st to first dc. Ch 1, do not turn.
R4: FPdc into FPdc from previous round, BPdc into BPdc from previous rnd continuing to alternate FPdc and BPdc in rem sts of the rnd, ensuring posts are always pushed in the same direction as the previous row. Join with sl st to first dc and fasten off.
Neck Edging
Before proceeding, measure garment neck, both as is and fully extended (stretched).
💡 Since different yarns handle differently, we need to ensure any further work to the neck keeps the garment big enough to fit comfortably over the wearer’s head. You may have a well-fitting garment on hand you can use as a reference. If not, you can refer to industry standards for head sizes by age provided by the Craft Yarn Council (CYC) which is my personal preference. However, another possible source is the CDC’s data which is more detailed.
Version A: Here I found a discrepancy between the CYC and CDC. CYC gives 35.5–40.5 cms for a baby, whilst the CDC suggests 47.8 cms as the 50th percentile figure for a boy of 18.5 months. To be on the safe side, I edged my neck with one row of hdc, working 1 hdc in ea st around, ending with a with sl st to first dc and fastened off.
Version B: For age 2, the CDC’s 50th percentile figure for a 24.5 month-old boy is 48.7 cms, whilst CYC says 40.5 – 46 cms for a toddler.So, working to a cautious estimate of 48.5 cms (19”) I proceeded as follows:
R1: Working from the RS (outside) of the garment, join D at CB and ch 1. Working over foundation chain and into the top of sts below, 1 dc into base of ch1, 1 dc into ea st around, join with sl st to first dc, ch1, turn. (Ideally check here for an even number of sts and adjust if necessary.)
R2: FPdc around the next dc, *BPdc around next dc, FPdc around next dc. Rep from * until 1 st remains. If you have an even number of sts you will finish with BPdc. Join with sl st to first dc. Fasten off.
Version C: 1 row sc all around. Join with sl st to first sc. Fasten off
Additional Notes on Version C
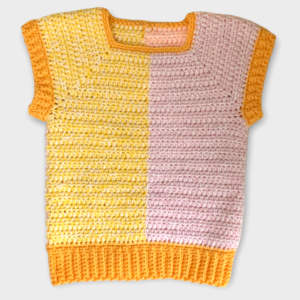
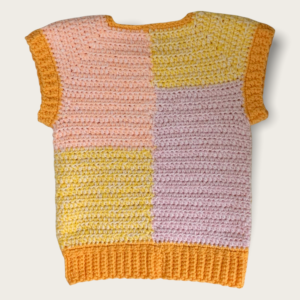
I changed the placement of colour changes in this version, so the sizes of colour blocks would better suit the proportions of this version. Briefly, the changes are:
- 6 extra rows are added at the back after R10 – so the extra rows would be R10.1-10.6.
- After the joining round, add 3 more rows with these colours – ie a total of 4 rows in these colours from joining round.
- Sleeves are not added.
- Neck is finished with one row of sc all around.
- The arm openings are finished with blosc ribbing, starting with 5 chs to create 4 sts of ribbing.
- Hem is finished with blosc ribbing, beginning with 9 ch, to create 8 sts of ribbing.
- For an excellent tutorial on this type of ribbing, the following video covers this ribbing technique really well. The demonstration starts at 2 minutes in:
Finishing Off
Weave in all ends, wash and/or block if you wish, and enjoy gifting your beautiful new garment.
I really hope you’ve found this helpful. I’ve made this garment four times now but am still working on it. So if you find any mistakes or have any questions, please do let me know by using the Contact Form.
Thank you so much for dropping by. If you make a version of this sweater yourself, please do share – I’d love to see your gorgeous makes!
Want to know when the pattern is updated? Subscribe below so you can be notified immediately.
© 2020-22 B for Baby. All rights reserved. For terms of use, please see here.