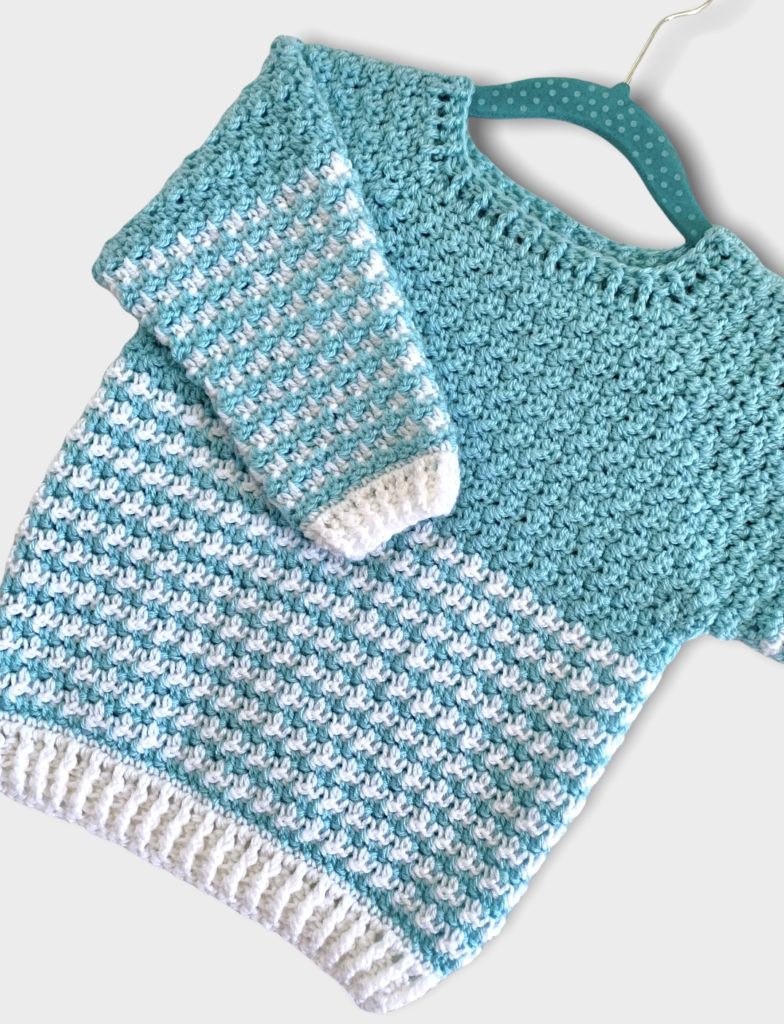
Meet Caden, a gender neutral baby sweater, finished at long last after most of the garment has been reworked multiple times.
First I found an error in the middle of the front then, while fixing that, I created another eyesore with the join at the back. I didn’t like the sleeves so reworked those, and eventually went with my third different approach to the neck.
I really like the finished version, though I may change the start point of the stripes when I do it next time. I used a hook bigger than recommended for good drape, and because I think a looser stitch really suits this particular stitch. It’s warm, soft, and very cosy! And looks great on 🙂
Anyway, I’ve now gifted this sample but kept my notes which I’ve summarised below. It’s created top down all in one piece in lemon peel stitch, which is alternating single crochet and double crochet. The combination makes a lovely houndstooth effect when working rows in alternating colours.
This one was designed for an 18-month old with extra room in the body and around the arm openings so it can go comfortably over layers in our wintry weather, and is easy to slip on and off as needed.
Yarn used here is Stylecrafts Special DK in Sherbet (shade 1034) and white.
Caden
Pattern and garment here designed for age 18 months years. Gender neutral jumper. Pattern will be updated shortly. Note this pattern is shared as is while testing is ongoing. These pattern notes are written using US terminology.
Samples shown
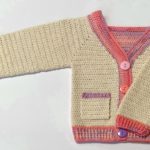
A. Beige with white – 4 ply yarn with hooks 4.5 and 3.5 mm approx age 1 year – images to follow
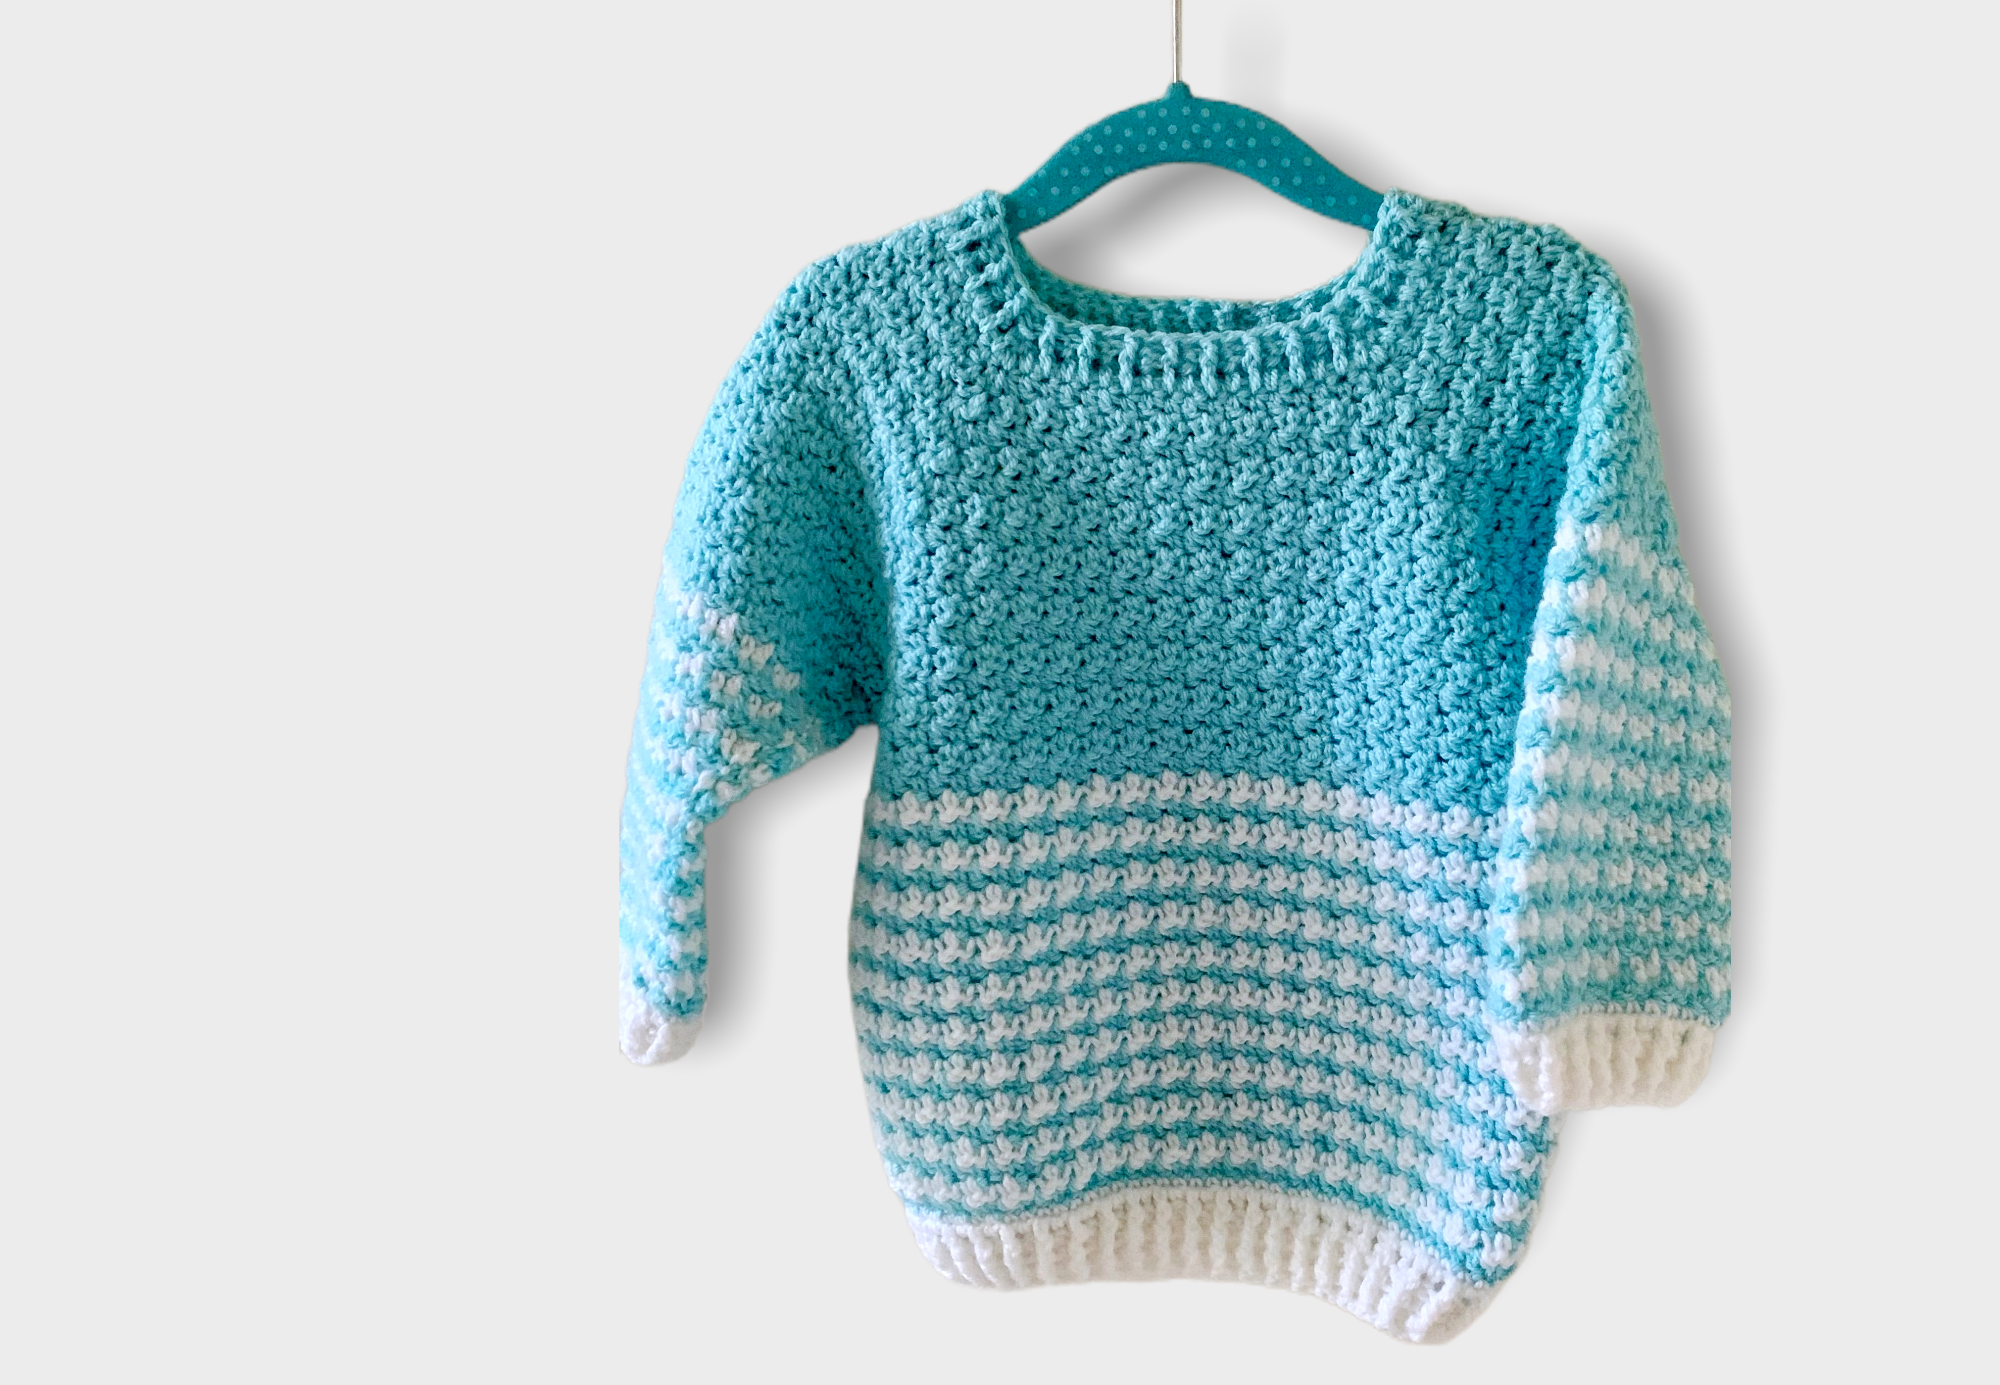
B. Turquoise with white – DK yarn, hooks 5.5 mm & 4.5 mm – approx age 18 months
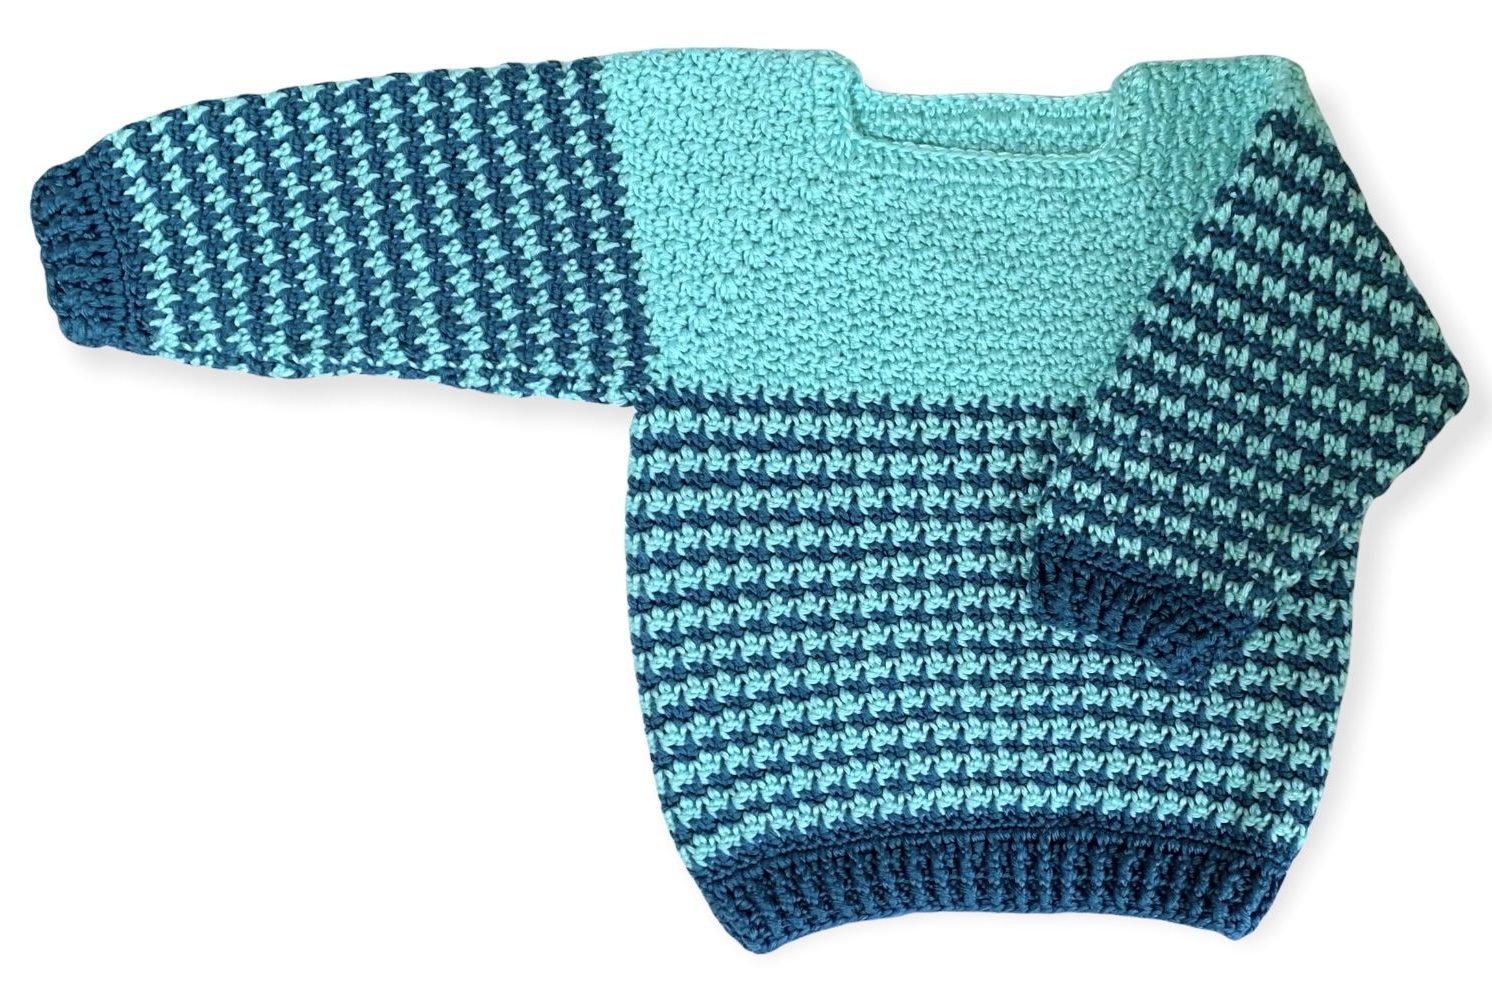
C. Duck egg with teal – Aran yarn, hook 6.0 mm and 5.5 mm – approx age 4 years – images to follow
N.B. Pattern variations:
A. I started stripes immediately
B. I started stripes in R 18, ie 4 rounds after dividing for sleeves
C. I started stripes immediately after dividing for sleeves
Finished Measurements
| Size A | Size B | Size C | ||||
| Approx age | 1 year | 18 months | 4 years | |||
| Neck opening (width) | 9 cms | TBC | 9 cms | 4” | 13 cms | 5” |
| Chest (laid flat) | 29.5 cms | TBC | 30 cms | 12″ | 34.5 cms | 14” |
| Armhole depth | 12.2 cms | TBC | 16 cms | 6″ | 17.5 cms | 7” |
| Sleeve length from underarm | 19 cms | 7.5” | 21.5 cms | 8″ | 26 cms | 10” |
| Garment length from top shoulder | 33.5 cms | TBC | 34 cms | 13.5″ | 42 cms | 17” |
| Garment length from neck front | 30cms | TBC | 32 cms | 12.5″ | 37 cms | 15” |
| All measurements are approximate |
Materials Used
- Hook (see below)
- Yarn (see below)
- Stitch Markers (I used five: four for the corner increase points and one to mark the end of each round at centre back and sleeves)
- Tapestry Needle for weaving in ends
- Scissors
- Tape measure or ruler
| Garment Size | Hook used for body | Hook used for ribbing | Yarn used |
| A: approx 12 months | 4.5 mm | 3.5 mm | Patons Fairytale Fab 4 Ply (Weight 2 / Sport / 4 ply) |
| B: approx 18 months | 5.5 mm | 4.5 mm | Stylecraft Special DK (Weight 3 / DK / Light Worsted / 8 ply) |
| C: approx 4 years | 6.0 mm | 5.5 mm | Caron Simply Soft (Weight 4 / Aran / Worsted / 10 ply) |
Skill Level
The pattern is designed with the intermediate crocheter or experienced beginner in mind. It’s not complicated, but requires confidence with working in the round, frequent colour changes, knowledge of increases and decreases, and creating ribbing with front post and and back post double crochet.
Yardage
All figures are approximate.
These are estimates, calculated by taking the weight of the finished garments, and also the weight of yarn remaining in each skein. I try to be as accurate as I can, but it’s probably best to have more than needed, just to be on the safe side.
| Size A | Size B | Size C |
| Beige: TBC | Turquoise: 130g / 4.3oz / 365m / 400yds [TBC] | Robin’s Egg: 200g / 6.5oz / 310m / 350yds |
| White: TBC | White: 105g / 3.5oz / 295m / 323yds [TBC] | Ocean: 160g / 5.2oz / 250m / 280yds |
| For samples shown here, I used the following yarns | ||
| Patons Fairytale Fab 4 Ply Beige 1005 & White 1001 100% Acrylic, 4 Ply 184m (201yds) per 50g (1.8oz) | Stylecraft Special DK Turquoise 1068 & White 1001 100% Acrylic, DK 295m (323yds) per 100g (3.5oz) | Caron Simply Soft Robins Egg 9780 & Ocean 9759 100% Acrylic, Aran 288m (315yds) per 170g (6oz) |
Abbreviations
These notes use US terminology
| BPdc | back post double crochet |
| FPdc | front post double crochet |
| CB | Centre Back – where you will be joining rounds. |
| CS | Corner Stitch, into which you will be working your increases, and where you’ll join to create sleeves and body. |
| CC | contrast colour yarn |
| MC | main colour yarn |
| ch | chain |
| dc | double crochet |
| LPS | Lemon Peel Stitch (sometimes known as Griddle Stitch). See Pattern Notes for further info. |
| R[#] | Round [#] or Row [#] |
| rem | remaining |
| rep | repeat |
| rnd(s) | round(s) |
| RS | Right side of garment (ie the outside when worn) |
| WS | wrong side (ie the inside of the garment when worn) |
| sc | single crochet |
| sk | skip |
| sl st | slip stitch |
| SM(s) | stitch marker(s) |
| sp | space |
| st(s) | stitch(es) |
| Work [#]tog | work [#] stitches together |
Gauge
10 cms x 10 cms (4″ x 4″) taken from finished garment:
| Size A | Size B | Size C |
| 17 sts x 15 rows | 14 sts x 13 rows [TBC] | 12.5 sts x 12 rows |
Pattern Notes
- Ch1 at the beginning of a round does not count as a stitch.
- The body of the sweater is worked in one piece from the top down with a square raglan yoke where increases are added at each corner. Ribbing is added at the bottom. The sleeves are then added on either side, worked in the round, with ribbing added at the end. Finally the neck is finished.
- When changing colour, pull through with the new colour on the final step of the last stitch of the old colour. If working the houndstooth sections, drop the old colour to the WS to be picked up again later, and continue working with the new colour.
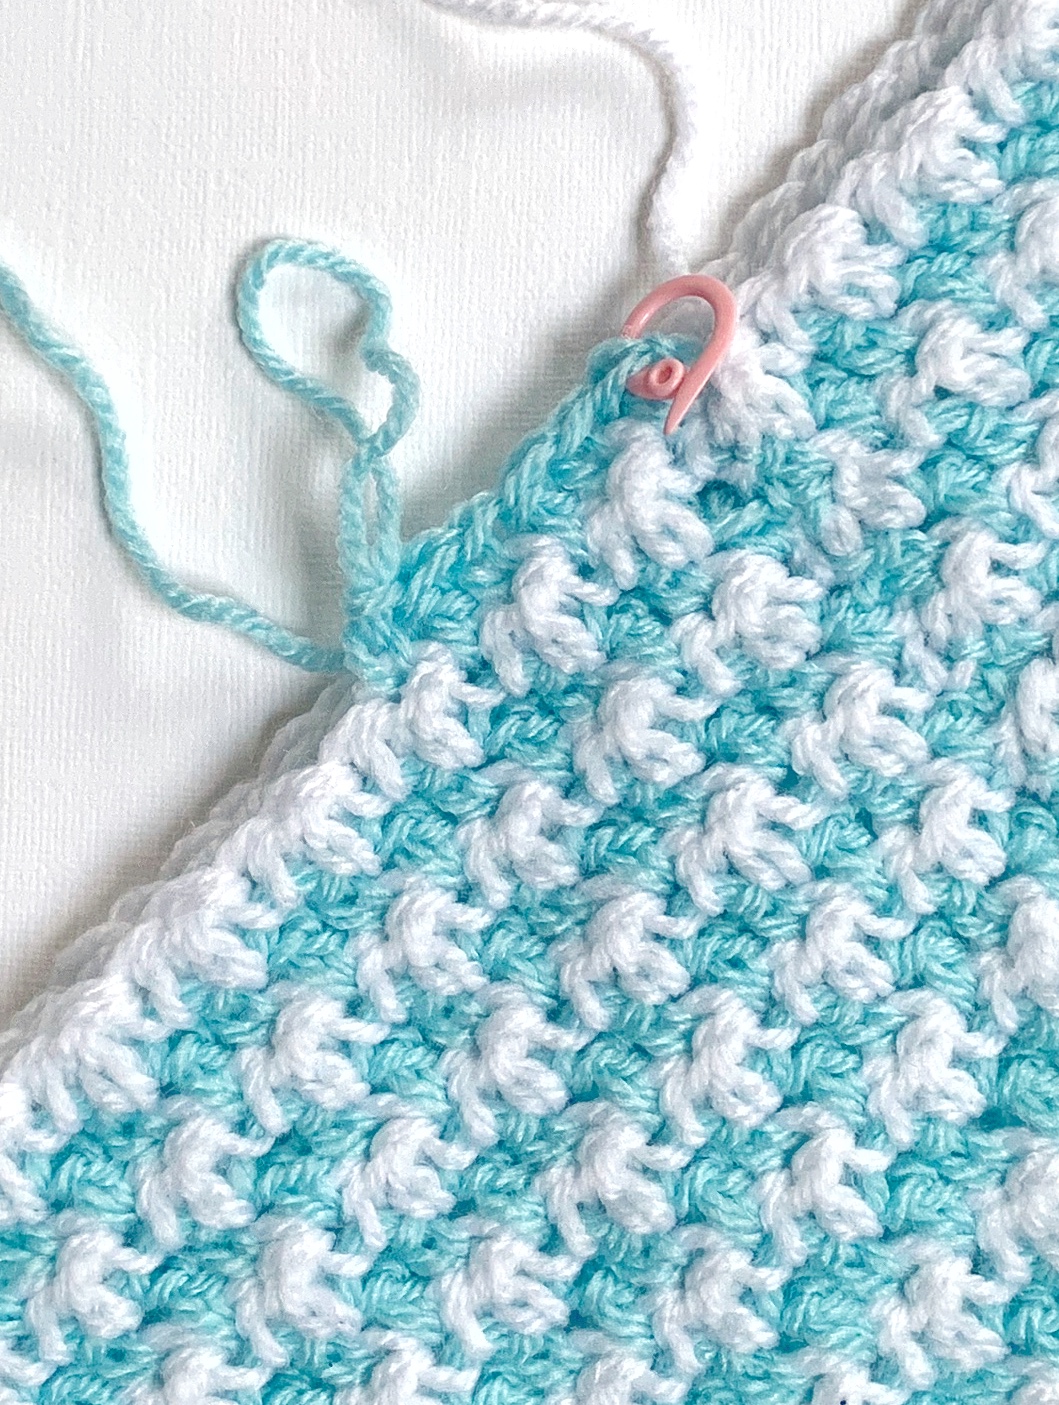
- Note: I find it easier to use a different coloured SM for the centre back (CB) compared to the SMs in the four corners.
- LPS is formed by alternating sc and sc. In subsequent rows, dc is worked into the top of sc and sc into the top of dc to create a “lemon peel” texture.
My Process
Getting Started
With hook a specified above, create foundation chain in MC:
| Size | A | B | C |
| Hook | 4.5 | 5.5 | 6.0 |
| Foundation chain sts | 60 | 60 | 60 |
| Approx length | 33 cms | 38 cms | 48 cms [TBC] |
Ensuring no twists in foundation chain, sl st to join ends forming a circle.
R1: (RS is facing as you work.) Ch 1, then sc all around. Place SMs either as you work around, or after the round is completed, before starting R2.
SMs to be placed as follows in stitches #10, #21, #40, #51:
| 9 | 1 | 10 | 1 | 18 | 1 | 10 | 1 | 9 | = 60 |
| #10 SM | #21 SM | #40 SM | # 51 SM | ||||||
| Back A | Corner | Shoulder A | Corner | Front | Corner | Shoulder B | Corner | Back B |
R2: ch1 and turn, working LPS all around by alternating sc and dc. Start with sc. Last st of the round will be dc.
Every time you reach a SM / corner, work the next st in the sequence plus an increase of two stitches, maintaining continuity of the LPS pattern. For example, if the stitch before your SM is dc, then in the corner stitch work (sc, dc, sc). If the stitch before the stitch market is sc, then in the corner stitch work (dc, sc, dc).
As soon as you’ve completed the corner stitch, move the SM up to the middle st of the three sts just completed. This will be the Corner Stitch (CS) in your next row. At the end of R2, sl st to first st to join, ensuring no twists.
R3: Ch 1 & turn. Now work as R2. First st will be a sc into top of dc which was last st of previous round. Mark this first st as you will sl st into here at end of this round.
R4-R13: Continue as previously, working dc into the top of sc and sc into the top of dc. Continue to inc by 2 sts in every CS, and sl st to join at the end of the round. At the end of R13, fasten off, leaving a tail long enough to weave in later. For now, leave the tail loose, and ensure the CB stitch is marked with a SM.
Extra Rows to Lift Back
💡 N.B. These extra rows lift the back of the garment which serves two purposes. It more accurately follows natural body contours, so helping to keep the wearer’s neck warm, and makes the front and back of the garment easier to identify.
R13.1-13.4: Ensure sts are pointing in the direction as though you have just turned your work. Rejoin CC yarn at the appropriate back corner and work additional rows of LPS along the back section only as follows:
| Size A | Size B | Size C |
| 4 extra rows | 4 extra rows | 4 extra rows |
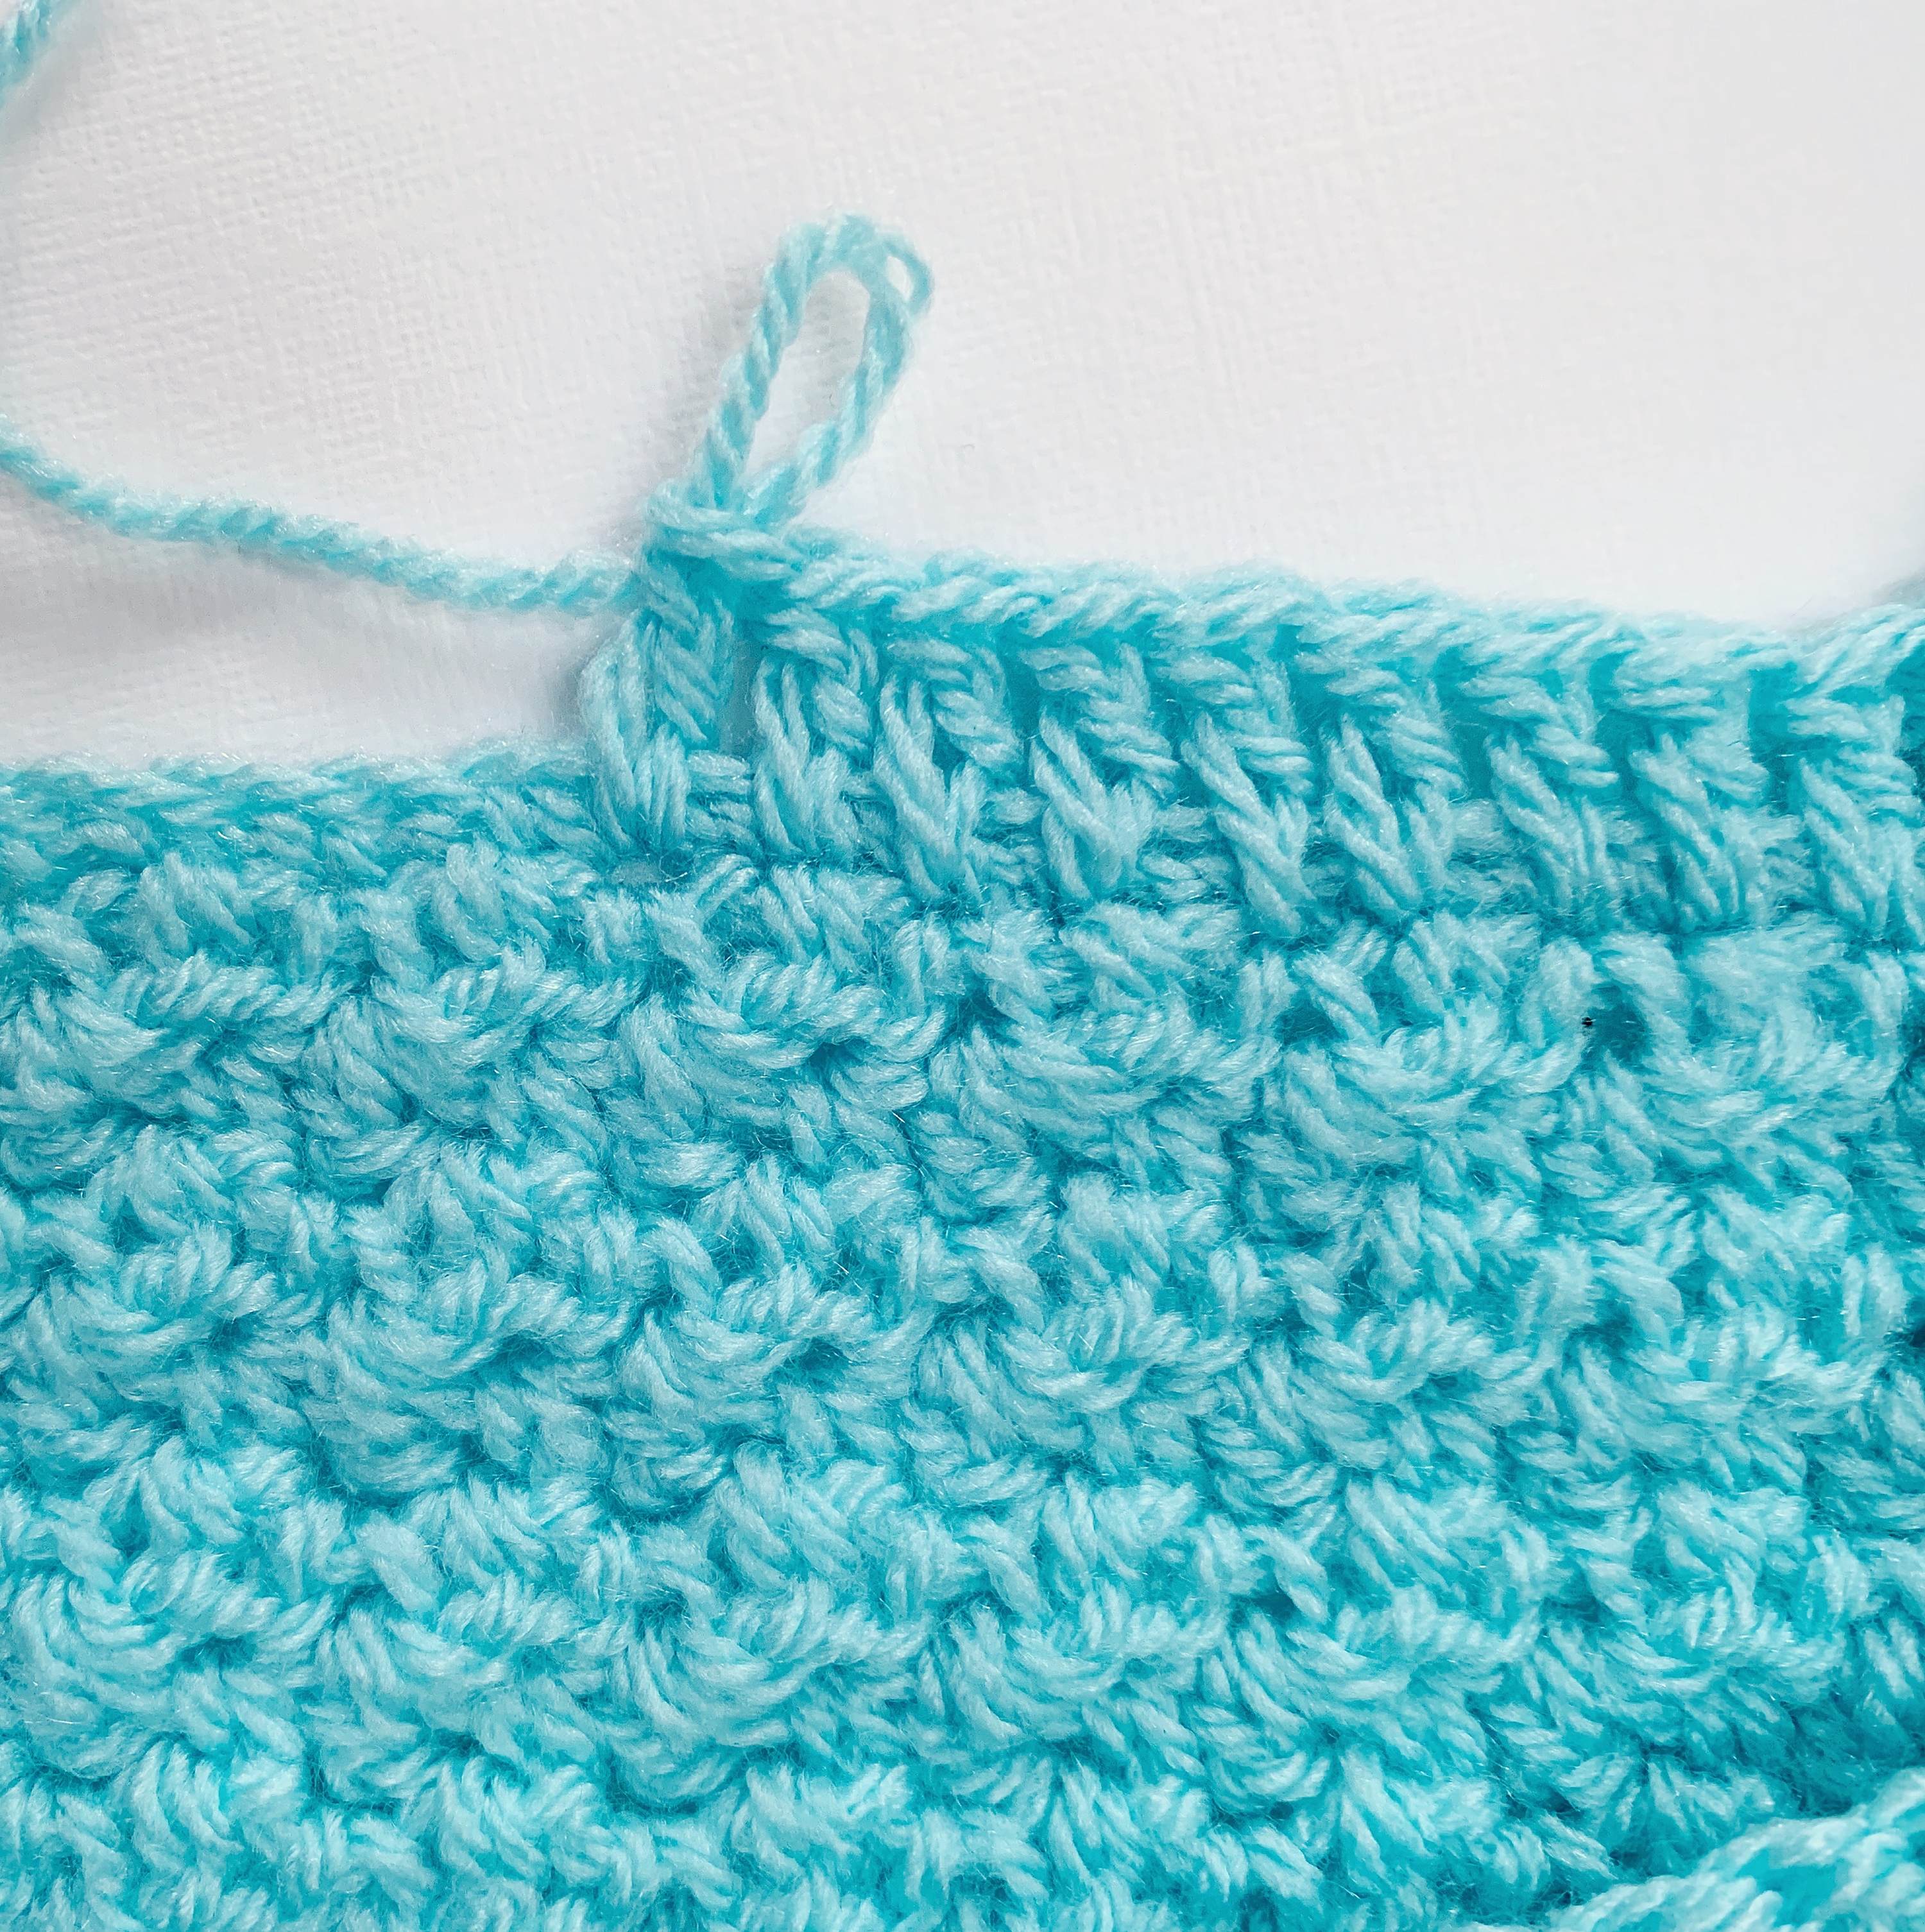
Fasten off. Using the the SM and tail from R13 as a guide, rejoin CC at CB. Ch 1 and turn. Proceed to Divide for Sleeves & Body.
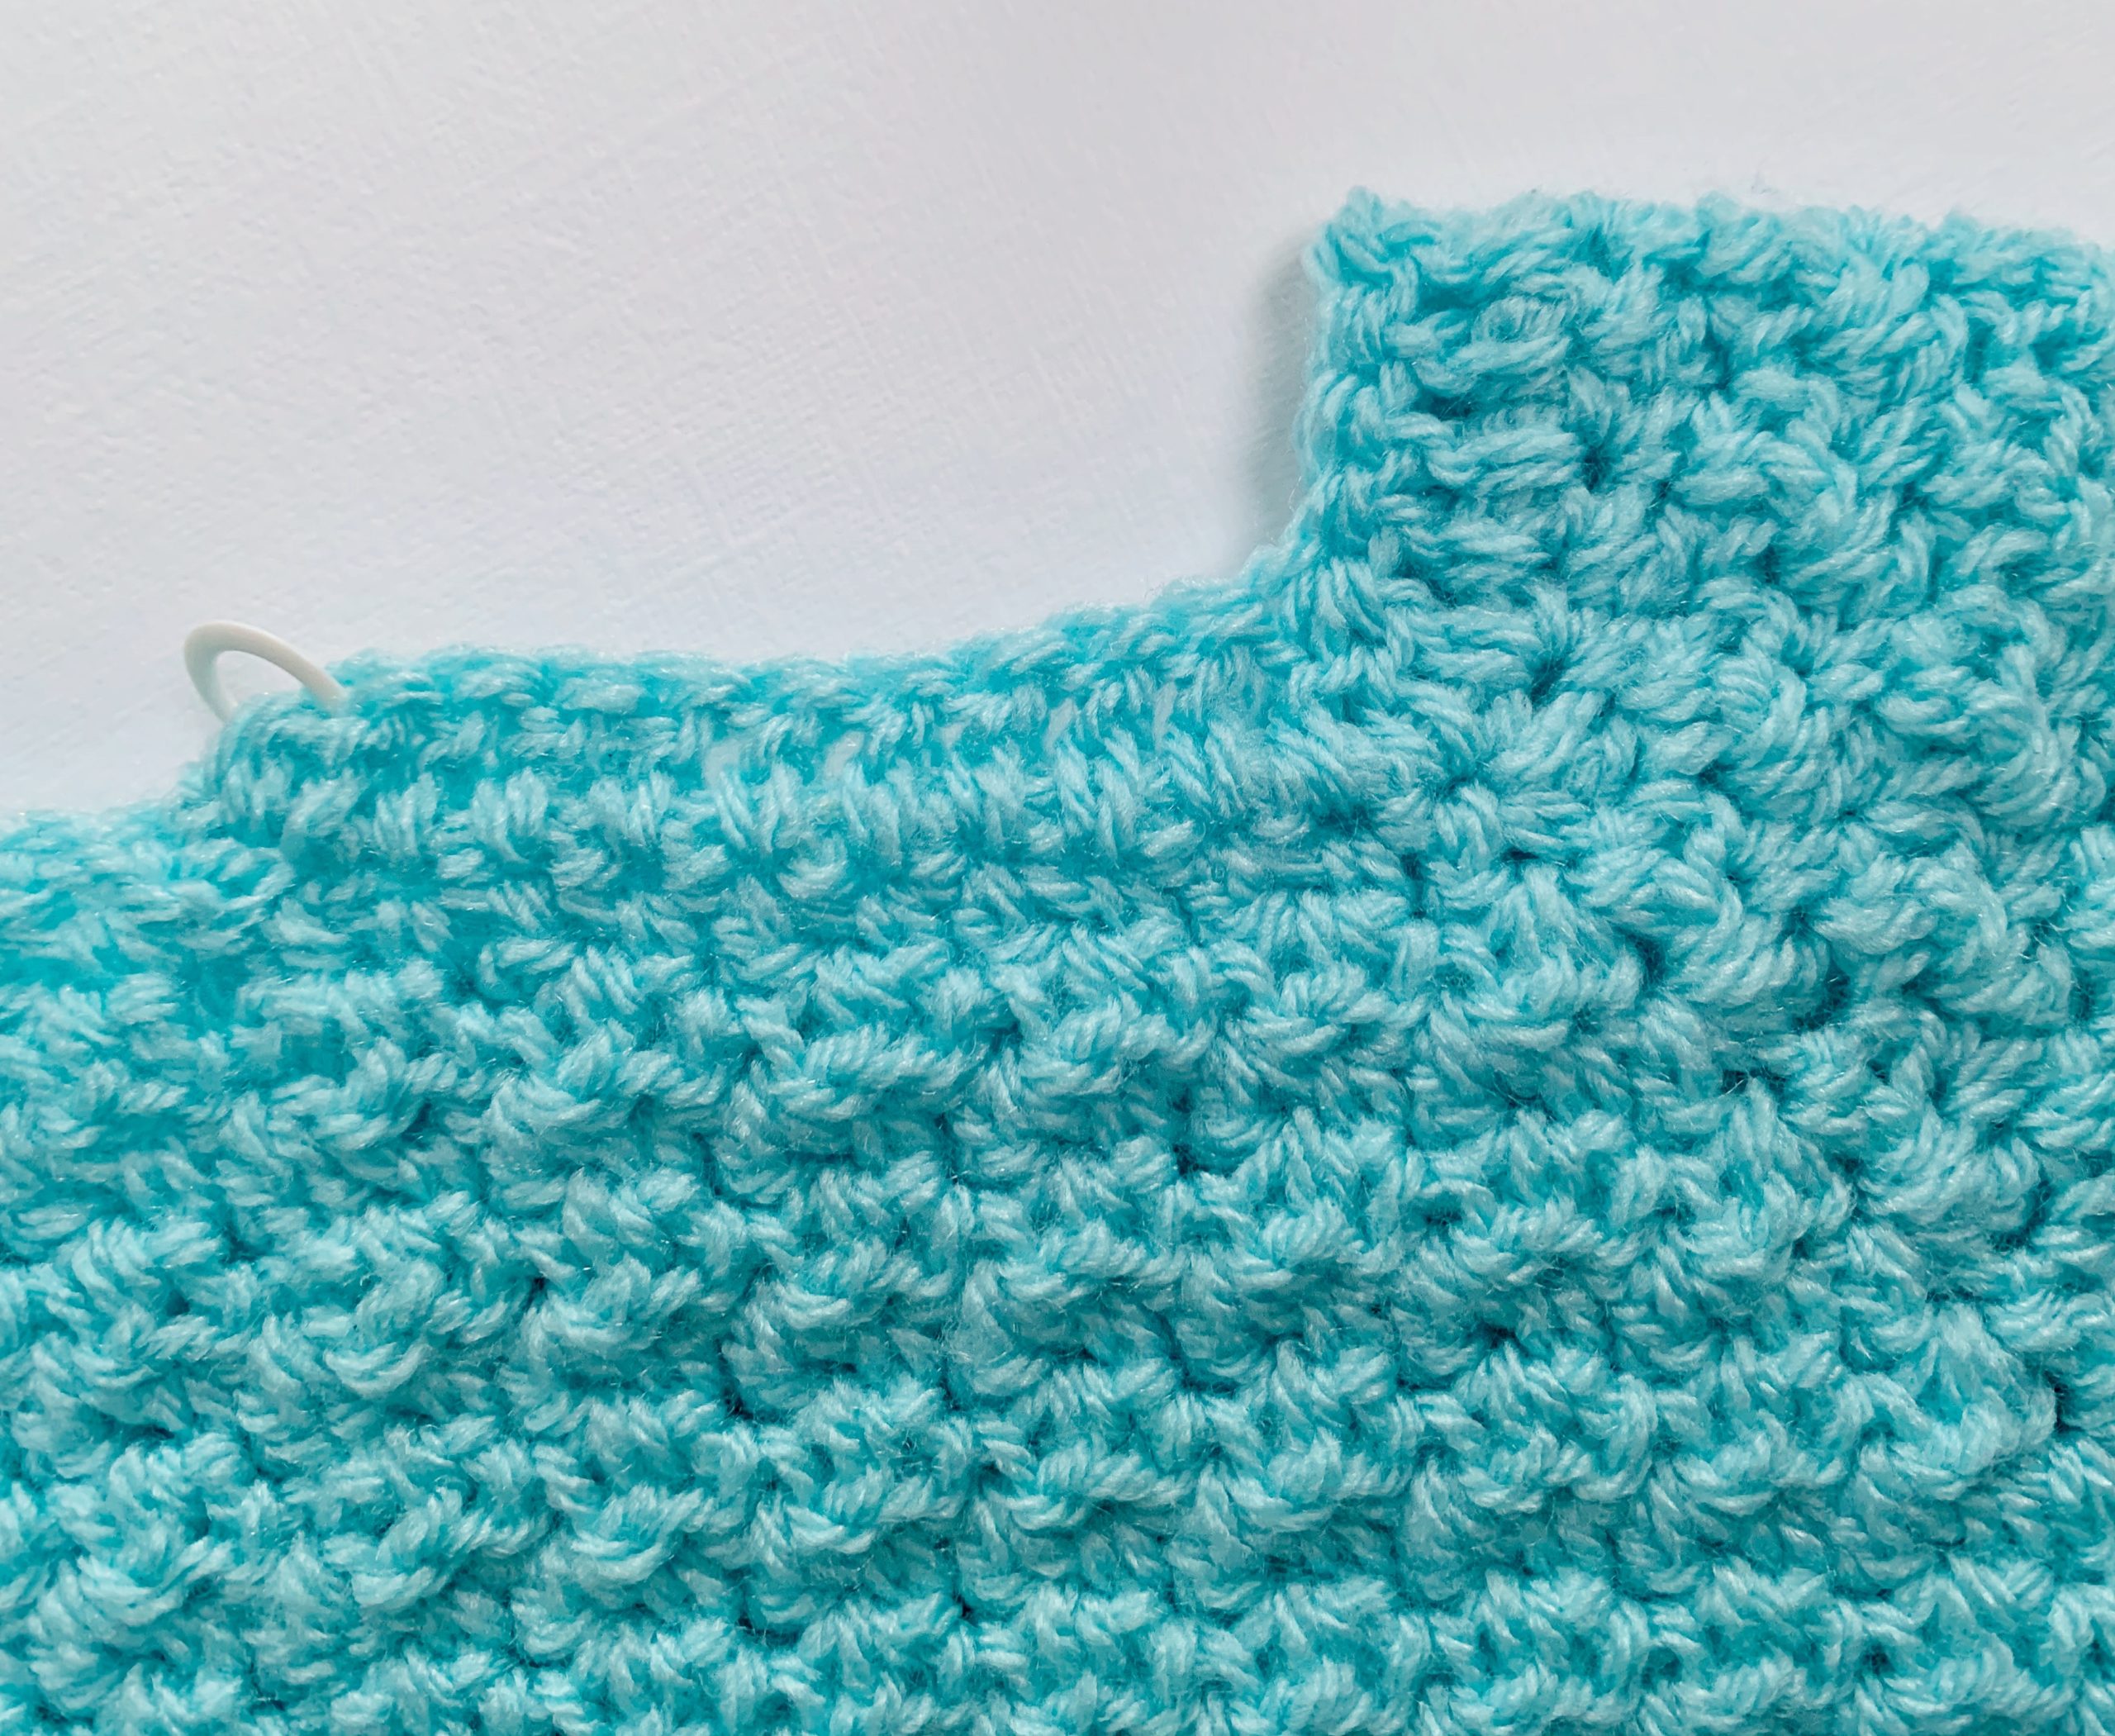
Divide for Sleeves & Body
R14: With MC, work LPS to first corner. In CS work one stitch and ch 2. Sk all sts along the shoulder section and work one st into the next CS, thus joining the two corners together, maintaining continuity of LPS throughout. For example, if the next st after the CS is dc, you will work sc into the corner; if the next st after the CS is sc you will work dc into the corner.
Now continue working LPS along the front section until the next CS. Work one st into the CS and ch 2. Sk all sts along the second shoulder section and work one st into the final CS, maintaining continuity of LPS throughout. Continue working LPS along the remaining sts of back section and sl st to join. Before completing sl st, pull through with CC.
💡Tip: it’s important to maintain continuity of LPS in the underarm areas and, if any sts have been accidentally lost or gained, it will become evident here. If you don’t have an even number of sts between the front and back sections, and if the stitch counts on both sides aren’t equal, you can correct here.
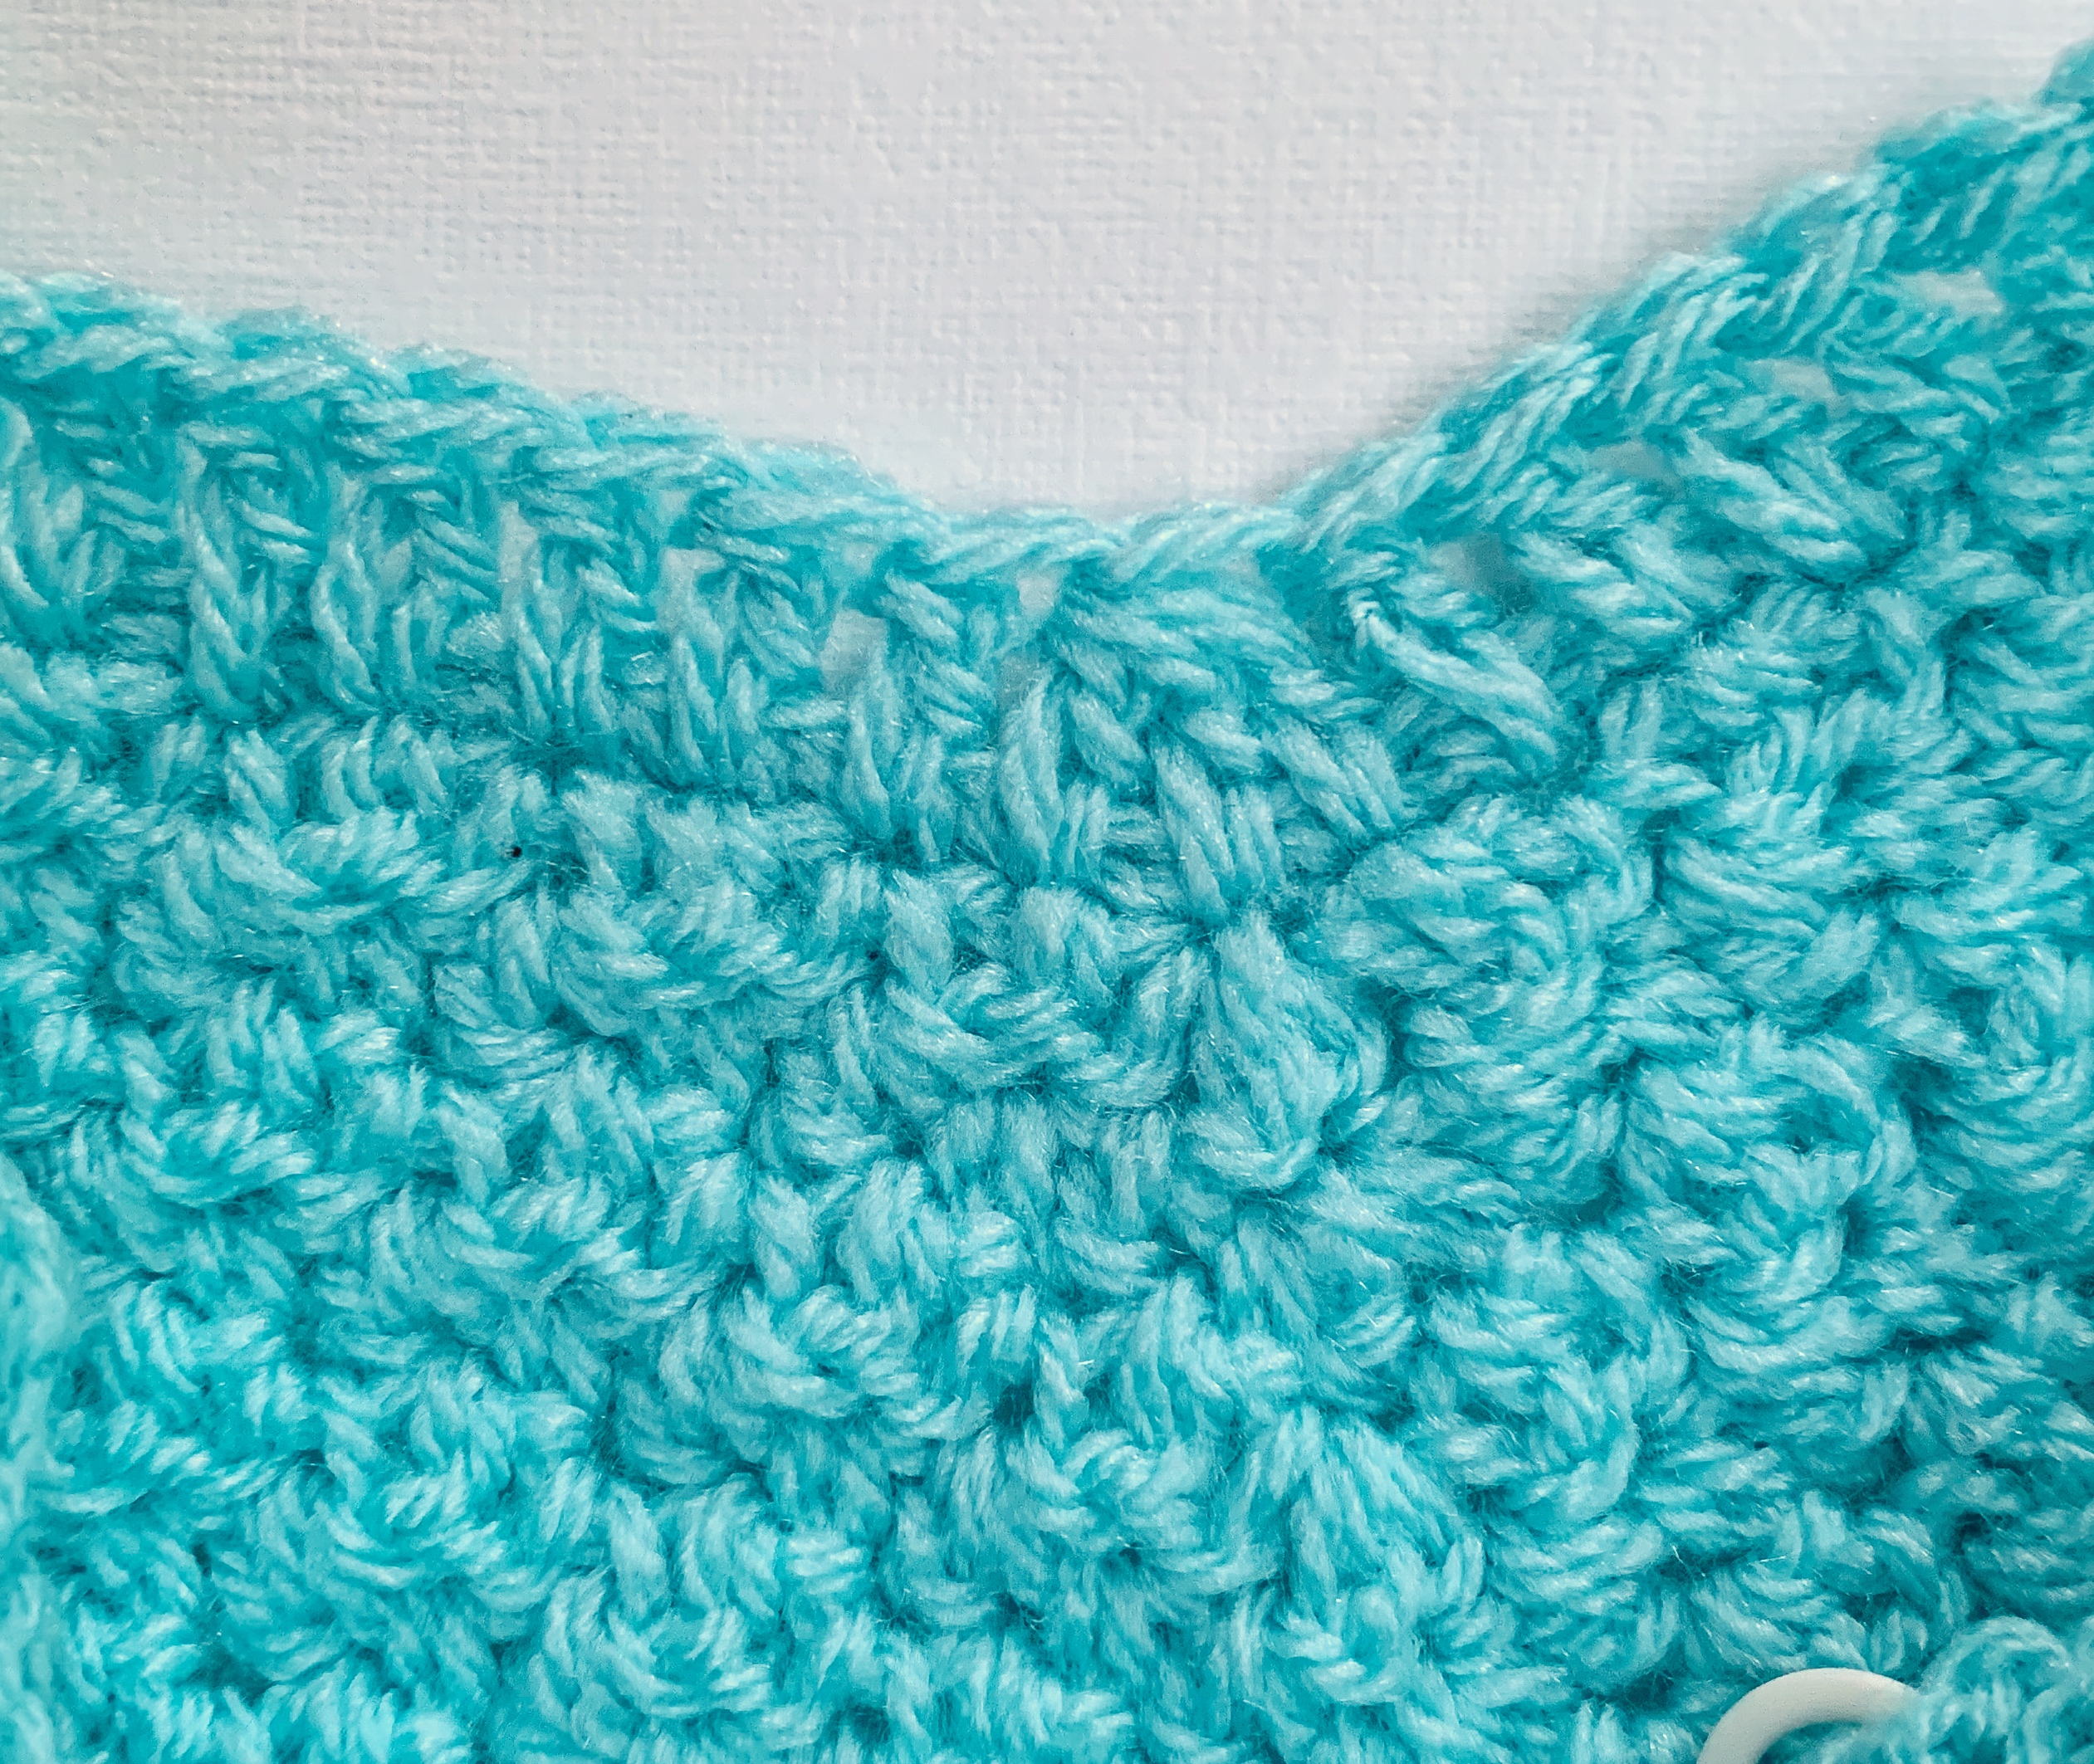
Begin Houndstooth Section
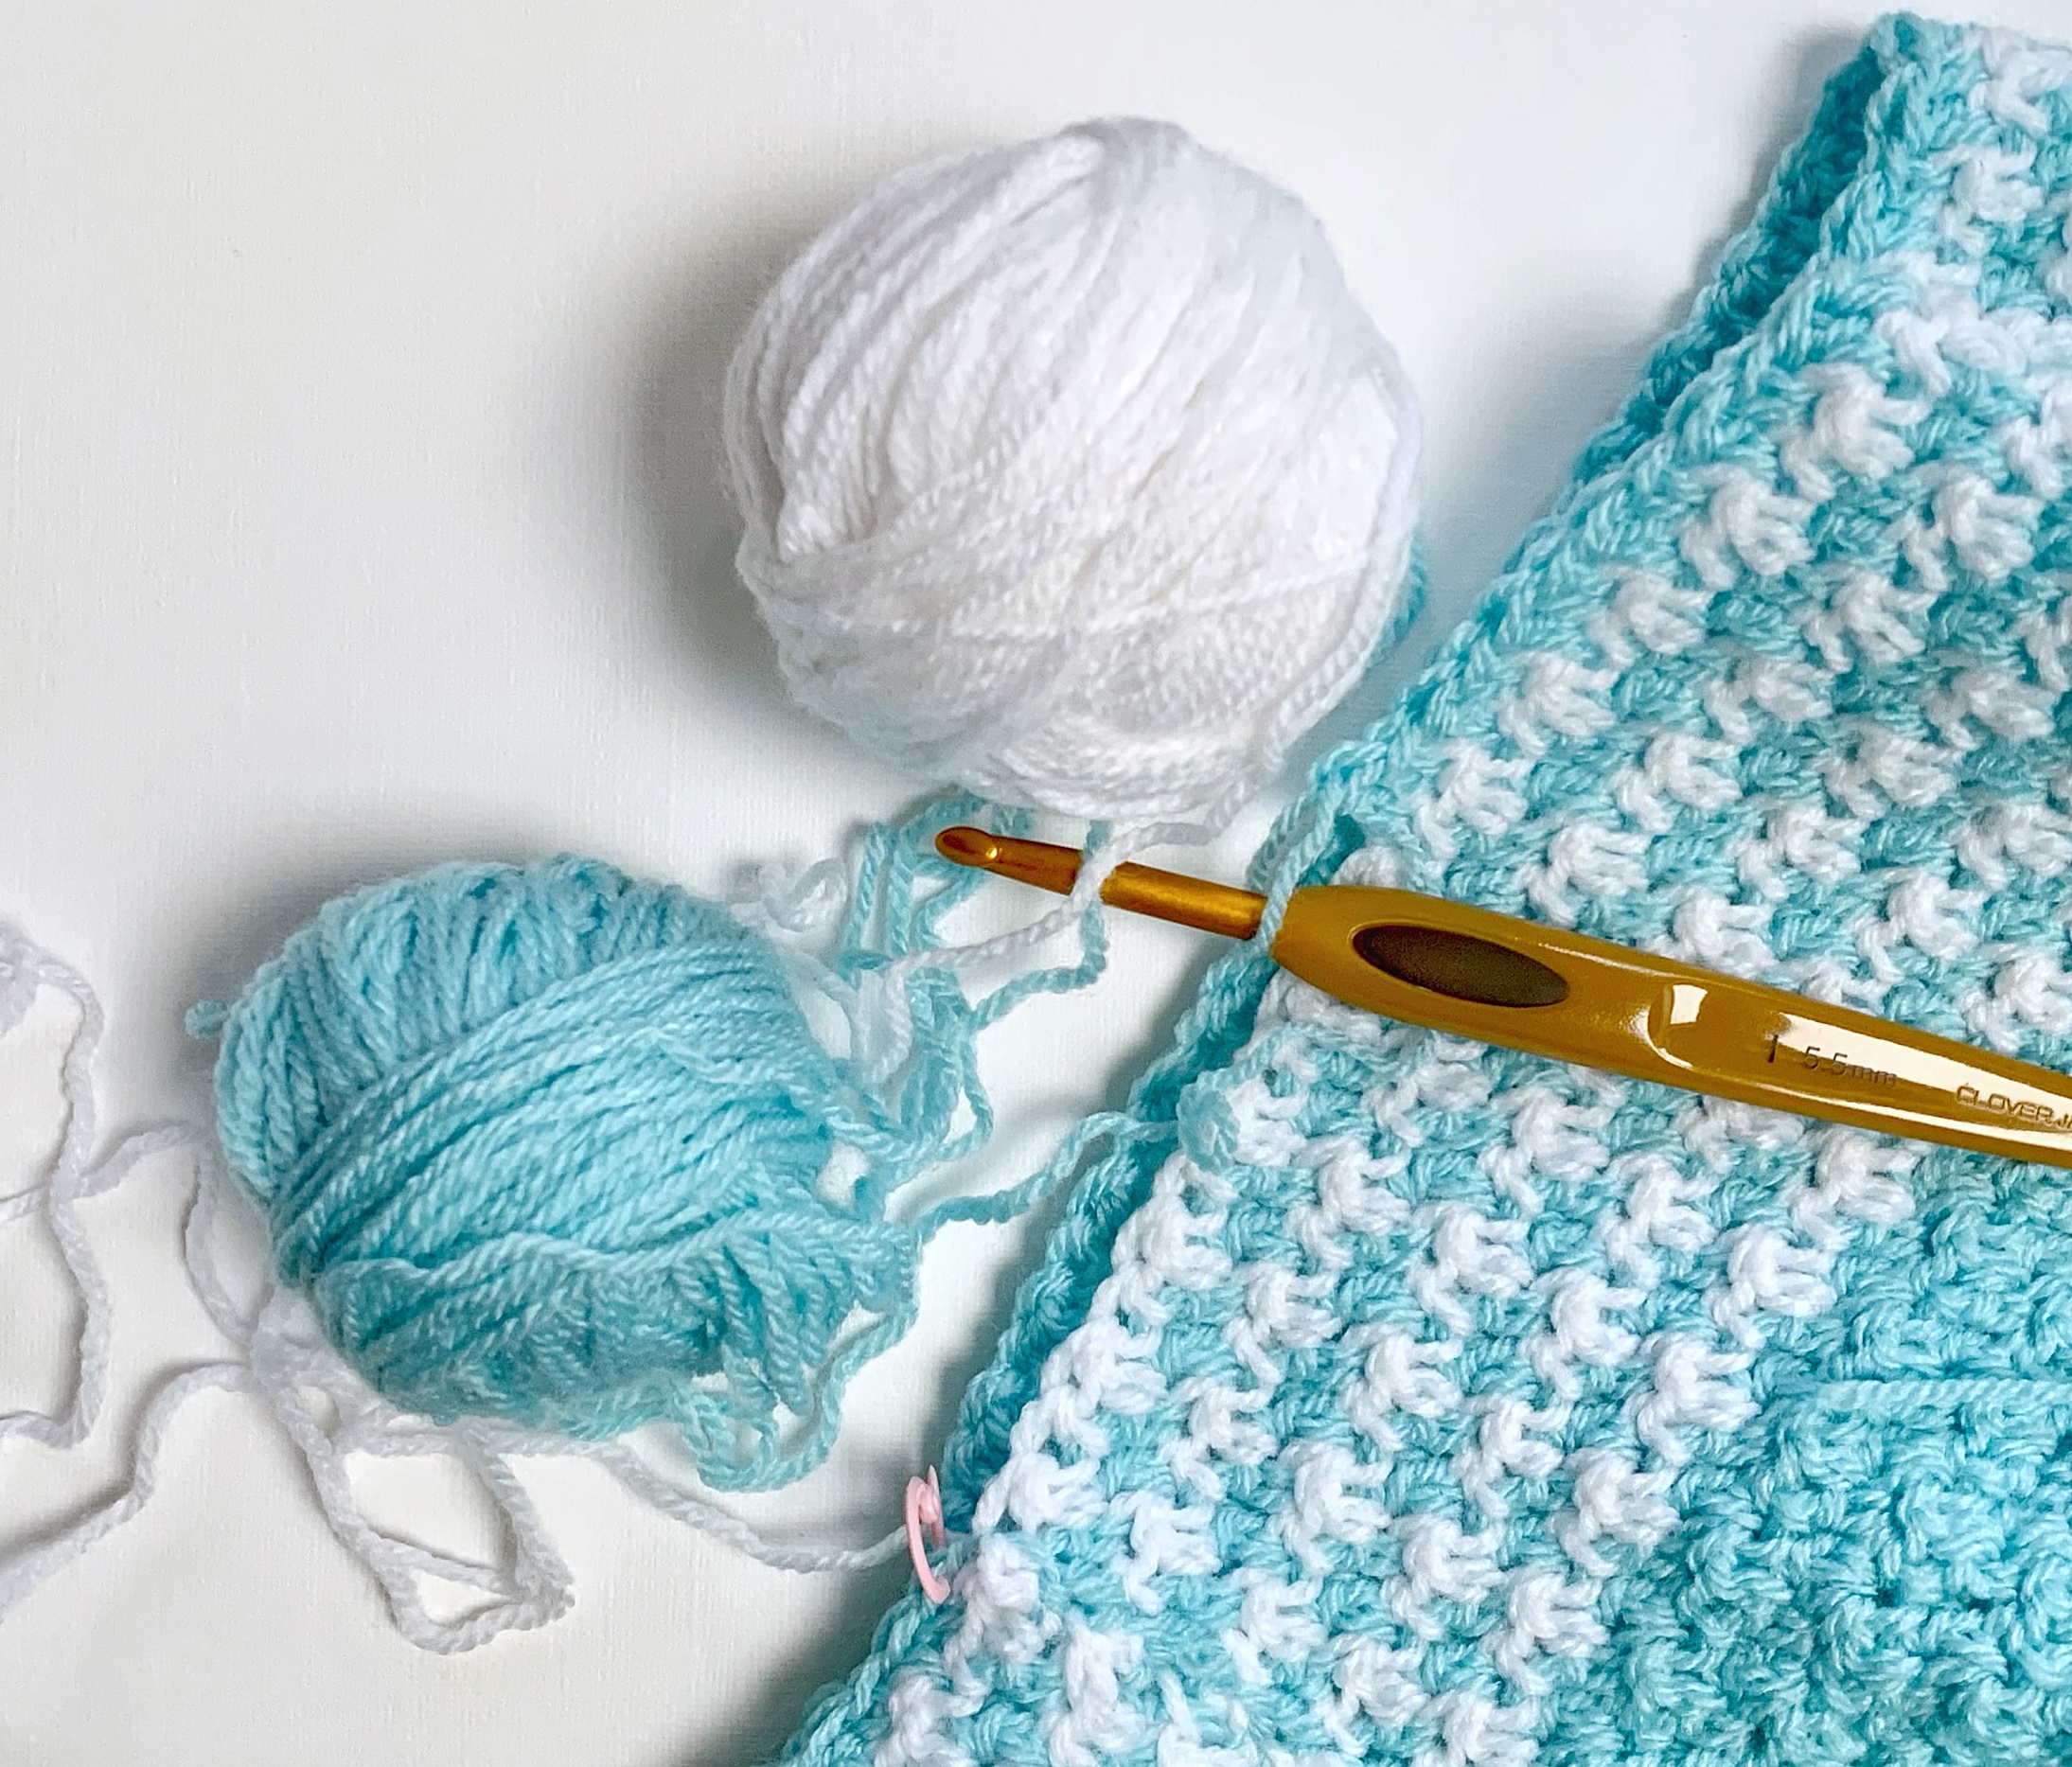
R15: With CC, work LPS all around, working one st into each of the underarm chains, thus maintaining continuity of LPS pattern. At the end of rnd, sl st to join and change to MC.
R16: With MC, work LPS all around. At end of rnd sl st to join and change to CC.
Next Rounds: Continue in this manner, alternating between MC and CC with each row until your total rows (counting from front neck) are as follows:
| Size A | Size B | Size C |
| 38 | 38 rows | 38 rows |
If necessary, add one more round to ensure the final round of this section is worked in CC. Fasten off MC.
Bottom Ribbing
Switch to smaller hook as specified (3.5mm / 4.5mm / 5.5mm).
R1: In CC and working from the RS (outside) of the garment, ch1 and turn. Work 1 sc into the next sc and place SM into the top of this sc.
Size A only: Work 1 sc into each next st around, ending with sc into the base of the ch1 you worked at the beginning of the rnd. Check that you have an even number of sts and adjust if necessary. Join with sl st to first sc.
Sizes B & C only: Work 1 sc into each next st whilst working 4 decreases distributed equally around, ending with sc into the base of the ch1 you worked at the beginning of the rnd. Check that you have an even number of sts and adjust if necessary. Join with sl st to first sc.
R2: Ch1 and turn. Work 1dc into the next sc and place SM into the top of this dc. Work 1dc in each next st around, ending with dc into the base of the ch1 you worked at the beginning of the rnd. Join with sl st to first dc.
R3: Ch 1 and turn. FPdc around the next dc, BPdc around next dc, FPdc around next dc, repeating this sequence to last st, continuing to alternate FPdc and BPdc in rem sts of the rnd. You should end with a BPdc. Join with sl st to first dc.
R4-R5: Ch 1 and turn. Continue to work the ribbing in the same way by alternating FPdc and BPdc, ensuring posts are always pushed in the same direction as the previous row to create ribbing.
Sizes B & C only: At end R5, join with sl st to first dc and fasten off leaving a tail long enough to weave in later. Proceed to Sleeves.
R6 (Size A only): Ch 1 and turn. Work one more row of ribbing alternating FPdc and BPdc all around. At end R6 join with sl st to first dc and fasten off leaving a tail long enough to weave in later. Proceed to Sleeves.
Sleeves
N.B. For turquoise & white sample shown in photos I changed to my CC (white) in round 4.
Switch to larger hook as specified for main body (4.5mm / 5.5mm / 6mm).
Ensure sts are pointing in the direction as though you have just turned your work. Join CC at centre of underarm.
R1: Ch1 and work LPS all around until 2 sts remain. Work 2tog at end, sl st to join, changing to MC.
Count sts and note number, to ensure same number on the other side.
R2: In MC, ch1 and turn. Work LPS all around and sl st to join, changing to CC.
R3: In CC, ch1 and turn. Immediately work 2tog then continue working LPS all around, sl st to join, changing back to MC.
R4: In MC, ch1 and turn. Work LPS all around and sl st to join, changing to CC.
R5: In CC, ch1 and turn. Work LPS all around until 2 sts remain. Work 2tog at end and sl st to join, changing to MC.
Next rounds: repeat R2-5 until rounds total number below or until desired length, finishing on CC row. After completing final row of MC cut MC yarn and fasten off, leaving a tail long enough to weave in later.
| Size A | Size B | Size C |
| 25 rows | 23 rows | 27 rows |
| Approx 17 cms | Approx 18 cms | Approx 31.5 cms |
Sleeve Ribbing
Switch to smaller hook as specified (3.5mm / 4.5mm / 5.5mm).
R1: In CC and working from the RS (outside) of the garment, ch1 and turn. Work 1 sc into the next sc and place SM into the top of this dc.
Size A only: Work 1 sc into each next st around, ending with sc into the base of the ch1 you worked at the beginning of the rnd.
Size B only: Work 1 sc into each next st around, ending with sc into the base of the ch1 you worked at the beginning of the rnd.
Size C only: Work 1 sc into each next st whilst working 1 decrease very 6th st until fewer than 6 sts remain. Work 1 sc into each rem st, to achieve final st count of 30. End with sc into the base of the ch1 you worked at the beginning of the rnd.
Check st count and adjust if necessary. Join with sl st to first sc.
R2: Ch1 and turn. Work 1dc into the next sc and place SM into the top of this dc. Work 1dc in each next st around, ending with dc into the base of the ch1 you worked at the beginning of the rnd. Join with sl st to first dc.
R3: Ch 1 and turn. FPdc around the next dc, BPdc around next dc, FPdc around next dc, repeating this sequence to last st, continuing to alternate FPdc and BPdc in rem sts of the rnd. You should end with a BPdc. Join with sl st to first dc.
R4: Ch 1 and turn. Continue to work the ribbing in the same way by alternating FPdc and BPdc, ensuring posts are always pushed in the same direction as the previous row. Join with sl st to first dc and fasten off leaving a tail long enough to weave in later.
Neck
How we proceed next will depend on the amount of stretch in the yarn we’ve used and how the garment is handling. We need to make sure the neck of the garment will fit over the wearer’s head comfortably, without being too loose when worn. So at this point we have design choices about which hook size to use, how many rows of edging or ribbing to add, and whether or not the neck needs a little tightening by working 2 or 3 sts together in the corners.
If you have a well-fitting garment of your wearer to hand you can refer to that, otherwise we can refer to standard size charts provided by the CDC or industry standard charts from the Craft Yarn Council (**to be added below).
Below I explain the steps I took for my own samples and measurements I was working to:
| Age | 1 year | 18 months | 4 years |
| Avge head circumference (cm) | 38 cms | 40 cms | 50.5 cms |
| Inches | 15” | 16” | 20” |
First, measure neck of garment without stretching, and check circumference again when fully extended (stretched).
R1: Attach MC yarn at CB and ch1.
Sizes B&C: With hook specified, dc all around working dc3tog in each corner.
All sizes: Work over the foundation chain into the sc row below, directly above the first row of LPS. sl st to join, check neck again and compare to measurement desired.
Size C only: fasten off leaving a tail long enough to weave in later.
R2: Ch1 and turn.
Size B only: Add one more round of dc in every st around, alternating FPdc and BPDC to create ribbing effect. Do not work 3 tog in corner. Sl st to join and fasten off, leaving tail long enough to weave in later.
Want to know when this post is updated? Subscribe below.
© 2020-22 B for Baby. All rights reserved. For terms of use, please see here.