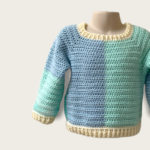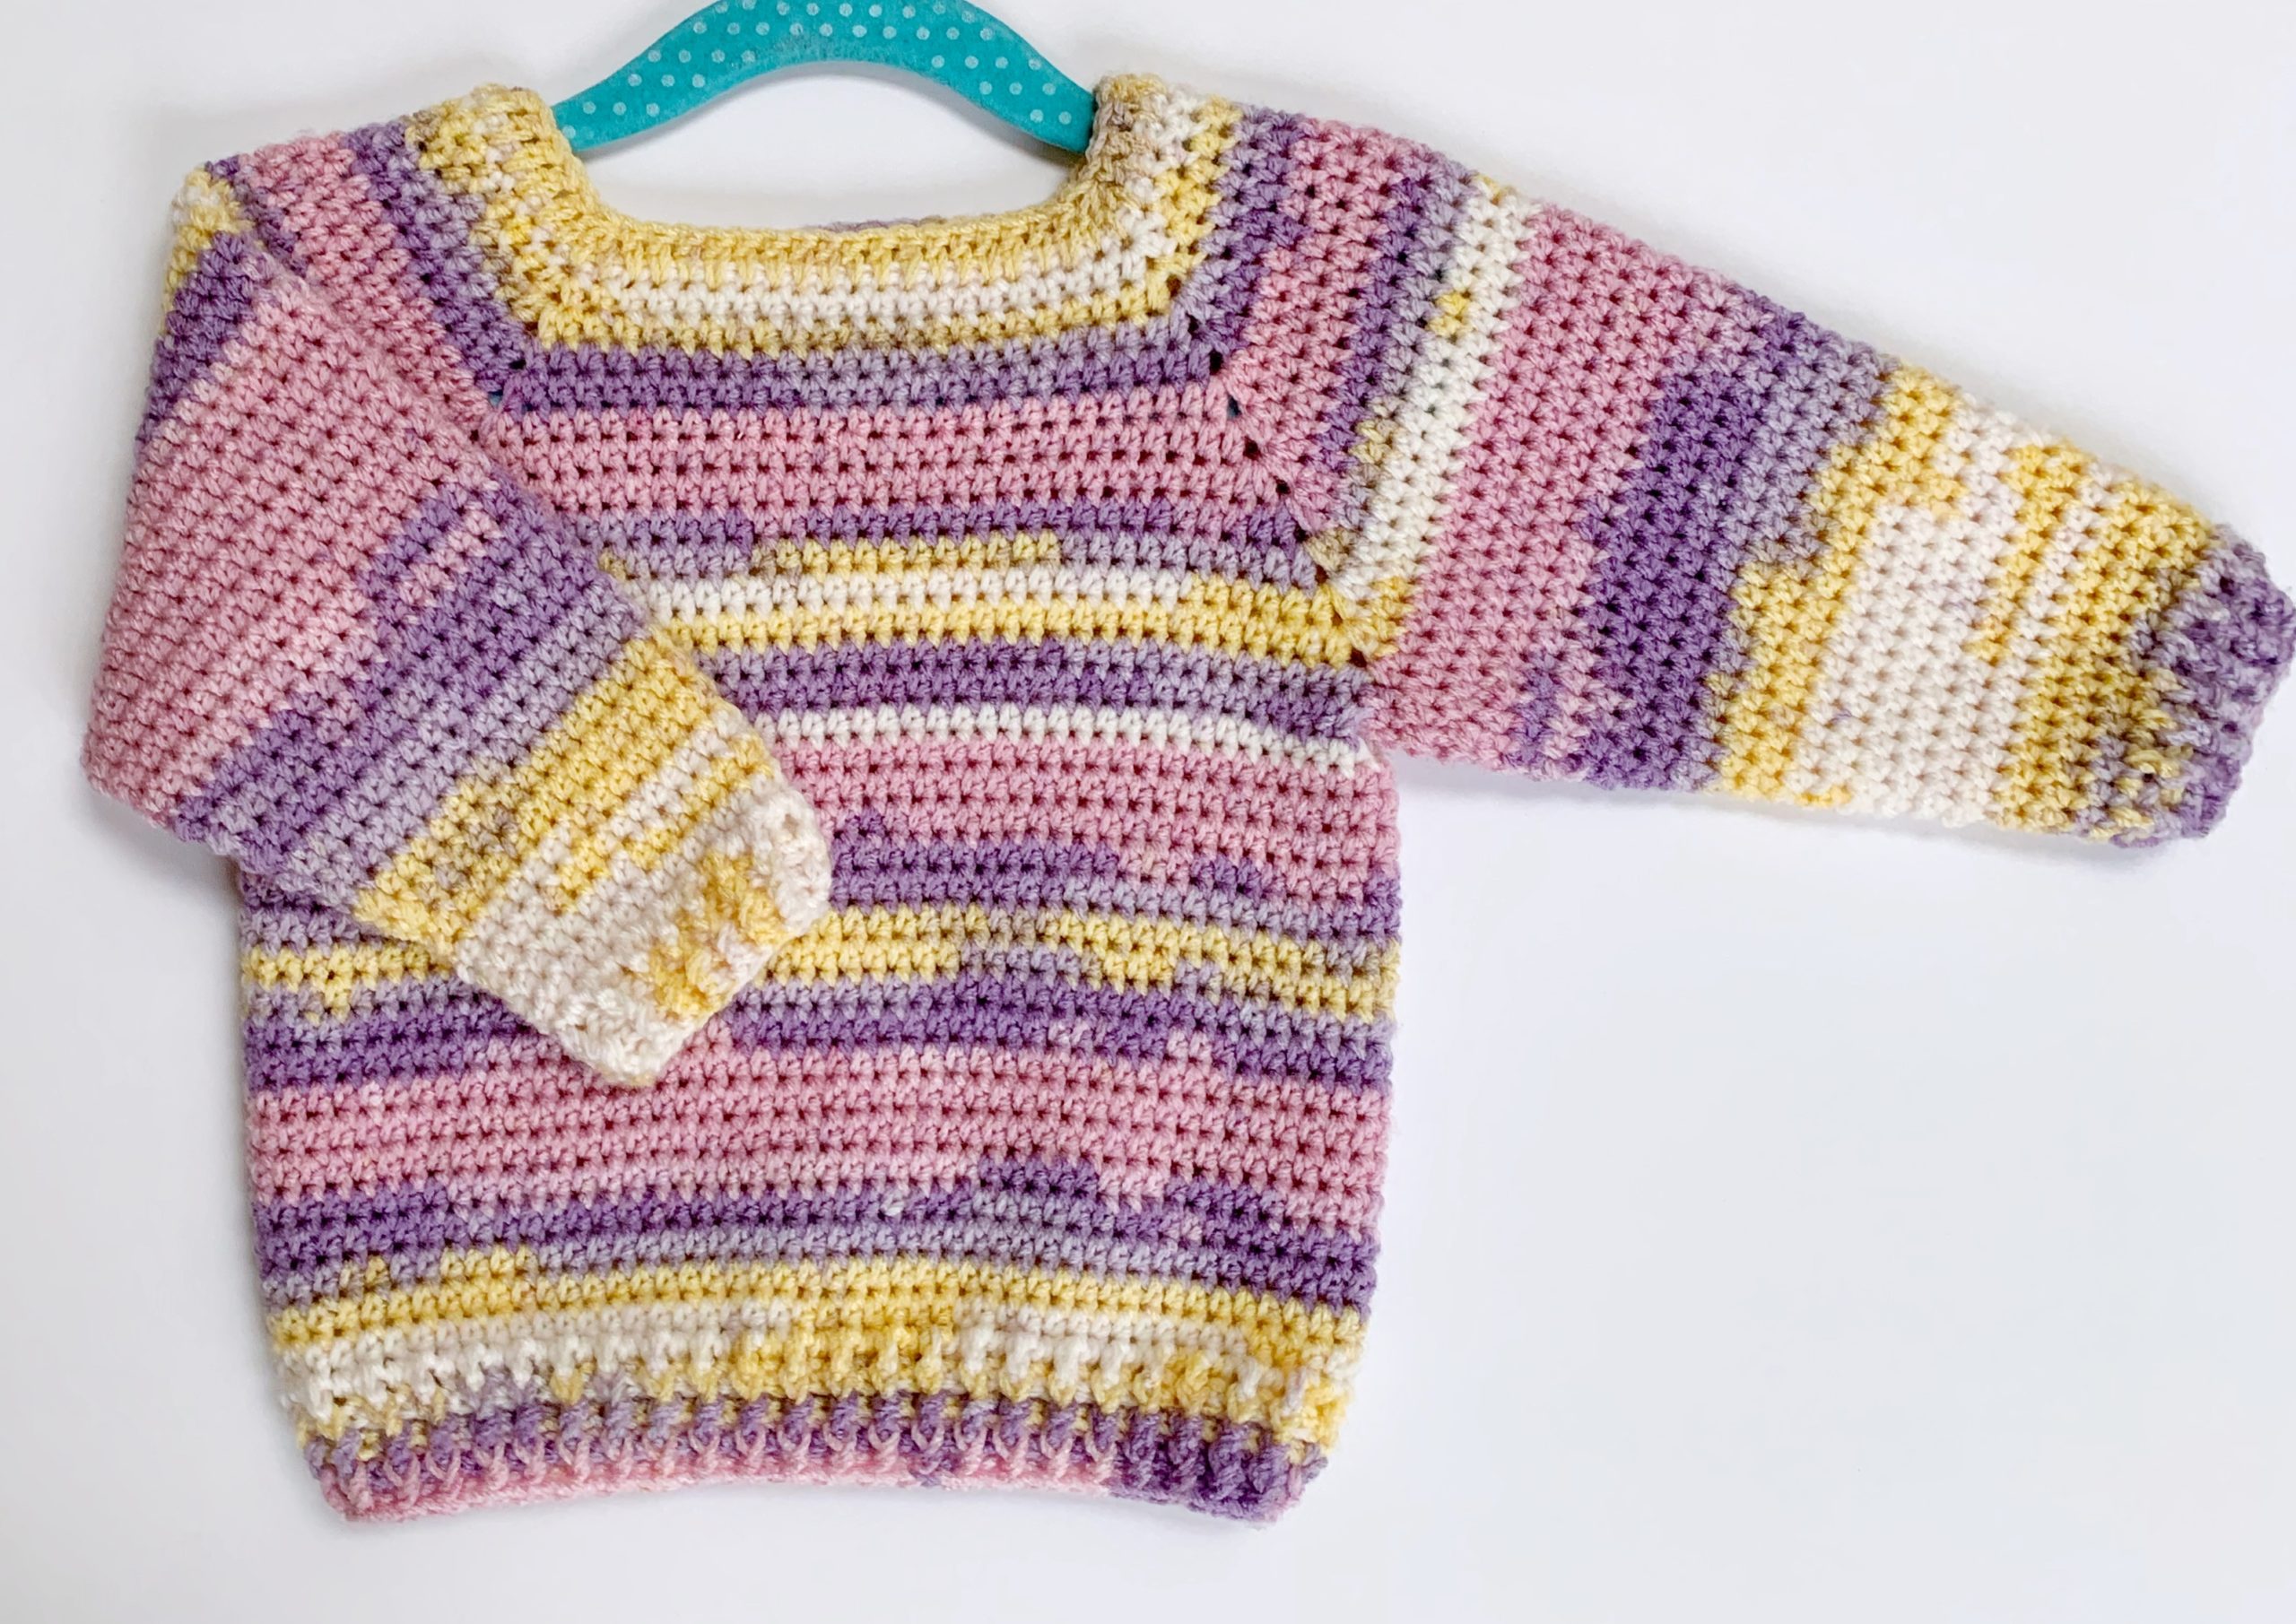
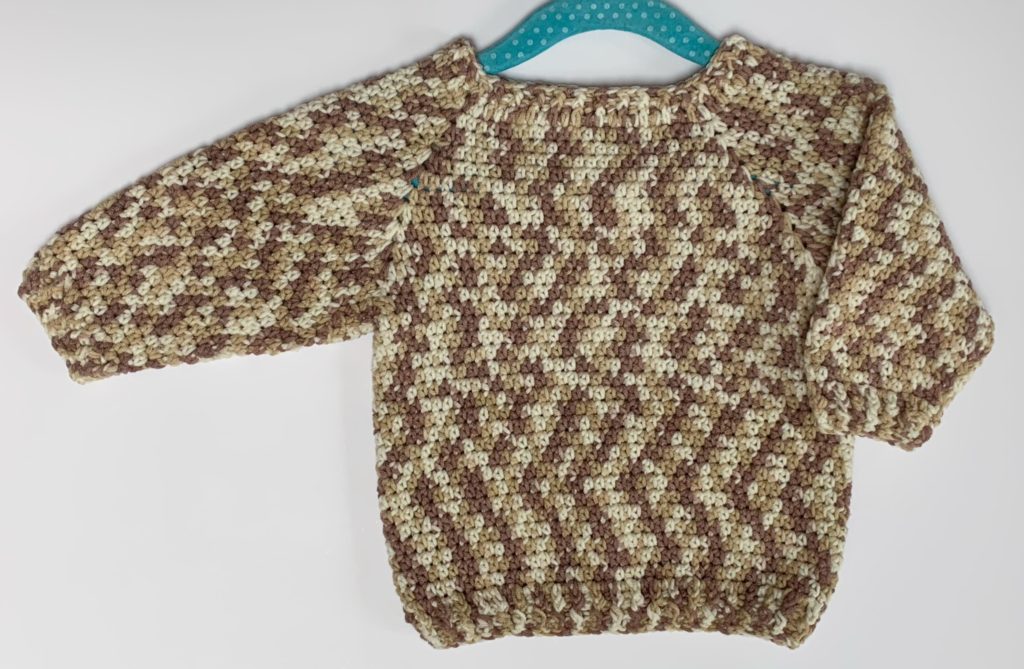
The great thing about Sloan is that it’s so quick and easy to make. It’s ideal for a baby shower, christening, or when you need to produce something in a hurry, and you want to make something you know you can produce quickly to a good standard.
It really is easy to make because it it’s almost entirely just one stitch, half double crochet; plus there are no seams, and practically no joins. Other than the ribbing, the body and arms are all produced in continuous spirals so there’s no joining or turning in between rounds to slow you down, and no joins visible in the garment either.
Designed in a DK (weight 3) yarn and 4 mm hook, the sweater works up quickly too (I’ve also tried a 12-month version using a 4.5 mm hook – see further below*.)
And I also think it looks really elegant. I really love the look of half double crochet worked in the round, so I think it has double bonuses of being quick and easy to make, and it looks wonderful.
Actually hdc is one of my favourite crochet stitches and I love the clean, modern look we get by working in this way. (Working hdc in between the posts is another option that can be used when we turn our work, which I’ve used in River cardigan, though I find that forms a denser fabric with less drape.)
I’ve been wanting to create a baby sweater like this for some time, and have now finally got around to doing it! Getting the full pattern notes written up formally may take some time so, meanwhile, here’s the brief version.
The notes are for a sweater for an approximate age of 6 months so please check the table below to check the measurements are suitable for the little one you have in mind. [i]If you’re not sure about the exact measurements of the child you’re making for, it’s always helpful to have a garment available that fits them well, so you can check it for size or, … Continue reading
(* I’ve worked this pattern up for six months using a 4 mm hook and for 12 months using the same stitch count with a 4.5 mm hook. The notes below are for the six-month version. For the 12-month version and measurements achieved using a 4.5 mm hook, scroll further down the page.)
If you’d like to give this a try, I’d love to see your finished makes. Here we go:
Notes & Instructions for Approx 6 Months
Finished Measurements
| Neck circumference: | 35 cms | 14″ |
| Chest (laid flat) | 25.5 cms | 10″ |
| Armhole depth | 11.5 cms | 4.5″ |
| Sleeve length from underarm | 18 cms | 7″ |
| Garment length from top shoulder | 31 cms | 12.25″ |
| Garment length from neck | 28.5 cms | 12.5″ |
| All measurements are approximate |
Materials Used
- Crochet Hooks: 4 mm (G/6), 3.5 mm (E/4)
- DK yarn (Weight 3 / Light Worsted / 8 ply)
- Stitch Markers (I used five: four for the increase points and one to mark the end of each round at centre back and sleeves)
- Tapestry Needle for weaving in ends
- Scissors
- Tape measure or ruler
Skill Level
The pattern is designed with the intermediate crocheter or experienced beginner in mind. It’s not complicated, but requires knowledge of increases and decreases and creating ribbing with front post and and back post double crochet.
Yardage
Approximately 150g (450 m / 500 yards ) of DK yarn.
For the 6-month sample I used James C Brett’s Cotton On yarn which has 145 m / 158 yards per 50g and is 50% cotton, 50% acrylic.
Abbreviations
These notes use US terminology
| ch | chain |
| sc | single crochet |
| dc | double crochet |
| dc[#]tog | double crochet [#] stitches together |
| hdc | half double crochet |
| hdc[#]tog | half double crochet [#] stitches together |
| st(s) | stitch(es) |
| sl st | slip stitch |
| sk | skip |
| sp | space |
| BPdc | back post double crochet |
| FPdc | front post double crochet |
| WS | wrong side |
| SM(s) | stitch marker(s) |
| rem | remaining |
| rep | repeat |
| rnd(s) | round(s) |
Gauge
Taken from finished garment: 12.5 rows, 17 stitches of the pattern = 10 cms x 10 cms (4″ x 4″).
Pattern Notes
- Ch1 at the beginning of a round does not count as a stitch.
- The body of the sweater is worked in one piece from the top down in a continuous spiral until ribbing is added at the bottom. The sleeves are then added on either side, worked and finished in the same way.
- In the sleeves and main body of the garment, do not join and do not turn at the end of the rounds. Instead, continue working in a continuous spiral. Mark the first st of the rnd with a SM and move the SM up to the first st of the next rnd immediately after beginning a new rnd.
- Note: I find it easier to use a different coloured SM for the centre back (CB) marked st, compared to the SMs in the four corners.
My Process
Getting Started
Foundation chain: Using 4mm hook, ch 68 to measure approximately 35 cms (14″).
Rnd 1: Ensuring no twists in the chain, work 1 sc directly into the first ch, thus joining the foundation chain to create a circle. Mark this first sc with a SM. This SM marks the centre back (CB) of the sweater and will represent the first st of every rnd. Continue to work 1 sc into each rem ch of the rnd. (Total sts: 68).
Place SMs: Counting the CB marked st as #1, now place additional SM in stitches #11, #24, #45, and #58.
Check SMs are correctly placed. There should be 20 sts between SMs 1 & 4 and also 20 sts between 2 & 3. There should be 12 sts between SMs 1 & 2, and also 12 sts between 3 & 4.
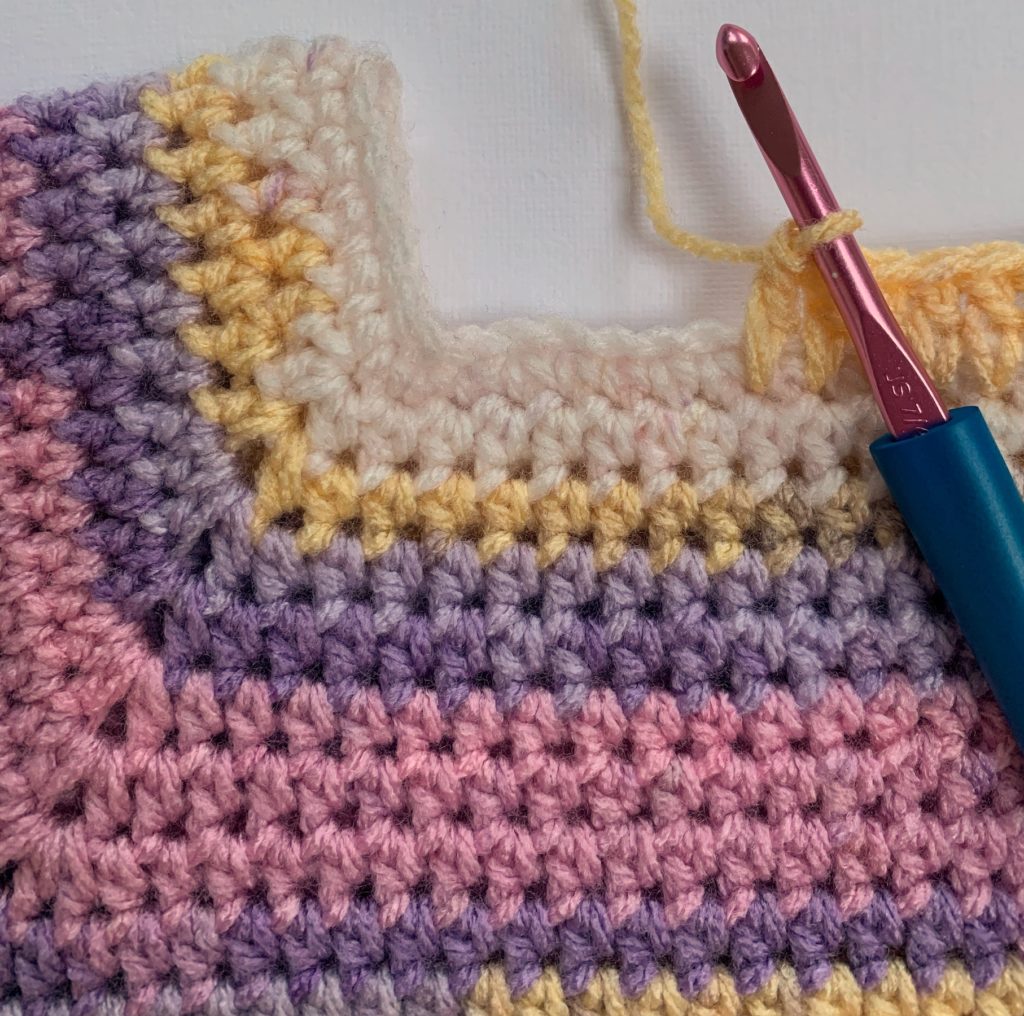
If you have not crocheted a raglan sweater before, you may find it helpful to refer to the diagram below. Otherwise, proceed to rnd 2.
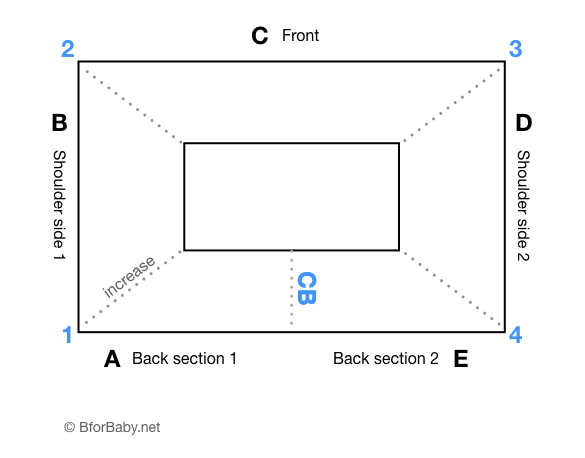
As shown in the diagram, these 4 marked sts will form the corners of the neck and create the raglan-style yoke. In every round of the yoke, we will work increases into the appropriate marked corner st and then immediately afterwards move the SM up to the next round. The number of increases worked into the corners will vary by round.
💡 Tip: It is a good idea to keep checking that the two shoulders (sections B and D) are both the same length, and that the front and back (sections C and A+E) are also equal to one another.
Rnd 2: Without turning, work 1 hdc into the top of each sc until the next SM which is a corner. (Remember to move the CB SM up to the new first st, as soon as you’ve worked the first st of the new rnd, here and throughout.) At this first corner work (hdc, ch 1, hdc) into the marked st. Remember to move your corner SM up to the ch1-space, here and throughout. Rep 3 more times working 1 hdc into each sc until the corner and working (hdc, ch 1, hdc) into the marked st. Then work 1 hdc into each rem st to the end of the rnd. (76)
💡 Something to be really careful of is not to miss the first stitch at the corner, the one before the chain space. Or, for that matter, the one after the chain space which can easily get hidden by stitches just worked. It’s very easy to overlook both of these (as I know from painful personal experience), and if this happens you end up losing one or more stitches every round, and the garments doesn’t grow at the right rate or in the right proportions.
Rnd 3: In this round, we are going to add an extra increase to the shoulder sections.
Without turning, continue working 1 hdc into the top of each st until the next SM which is a ch-1 sp. In this ch-1 sp, work (hdc, ch 1, 2hdc). Continuing along the shoulder, work 1 hdc into the top of each st until the next ch-1 sp. Into this ch-1 sp, work (2hdc, ch 1, hdc). Working now along the sweater front, work 1 hdc into the top of each st until the next ch-1 sp. Into this ch-1 sp, work (hdc, ch 1, 2hdc). Now working along the second shoulder, work 1 hdc into each st until the final ch-1 sp. Work (2hdc, ch 1, hdc). Work 1 hdc into each rem st to the end of the rnd. (88)
Rnd 4: In this round, we are increasing in each corner equally.
Without turning, continue working 1 hdc into the top of each hdc until the next SM which is a ch-1 sp. Work (hdc, ch 1, hdc) into the ch-1 sp. Rep 3 more times, and work 1 hdc into each rem st to the end of the rnd. (96)
Rnd 5: Rep rnd 4. (104)
Rnd 6: Rep rnd 3. (116)
Rnds 7 – 12: Rep rnds 4, 5 and 6 in the same order, twice. (173)
Check the measurements of your garment to ensure armhole depth and chest width are now adequate.
💡 Tip: If necessary, you can add a little extra chest width by adding extra chains under the arms in the next step.
Assuming measurements are good, proceed to Divide for Sleeves & Body.
In this next round and with reference to the diagram above, we will join corner 1 to corner 2, and join corner 3 to corner 4. We will return later to sections B & D, which become the sleeves, and meanwhile continue to work on the body of the sweater.
Divide for Sleeves & Body
Rnd 13: Without turning, continue working 1 hdc into the top of each hdc until the next SM which is a ch-1 sp (corner 1). Work 2hdc into the ch-1 sp, ch1, sk all sts until the next ch-1 sp (corner 2), work 2hdc into the ch-1 sp of corner 2, work 1 hdc in every st along to corner 3, and then repeat the joining method to join corners 3 and 4. Continue with 1 hdc in every st rem to the end of the rnd.
Rnd 14: Without turning, continue working 1 hdc into the top of each hdc around, until the end of the rnd, working into the sts and the ch(s) in the underarm areas.
Rnd 15: Without turning, continue working 1 hdc into the top of each hdc around, until the end of the rnd.
Next rnds: Rep rnd 15 a further 16 times to complete a total of 31 rounds, or until work measures 3 cms less than desired length.
Rnd 32: (or final round before bottom ribbing) Without turning, continue working 1 hdc into the top of each hdc until final 2 sts. Work 1 sc, then sl to join to previous round at CB point. Change to hook 3.5mm.
Bottom Ribbing
Rnd 1: Using hook 3.5mm, ch1 and turn. Work 1dc into the next hdc and place SM into the top of this dc. Work 1dc in each next st around, ending with dc into the base of the ch1 you worked at the beginning of the rnd. Check that you have an even number of sts and adjust if necessary. Join with sl st to first dc.
Rnd 2: Ch 1 and turn. FPdc around the next dc, BPdc around next dc, FPdc around next dc, repeating this sequence to last st, continuing to alternate FPdc and BPdc in rem sts of the rnd. You should end with a BPdc. Join with sl st to first dc.
Rnd 3: Rep rnd 2 once more or until desired length. Fasten off and cut yarn, leaving a tail long enough for weaving in.
Sleeves
Rnd 1: Using hook 4mm, join yarn at centre st of underarm. Ch 1 and hdc in next hdc. Mark this first hdc. Continue working 1 hdc in every hdc around until final 2 sts before SM. hdc2tog.
Next rnds: Continue working in a spiral, working hdc2tog every time in the final 2 sts before reaching the SM. Stop after 16 decreases (ie at rnd 17) or at 3 cms before desired sleeve length. For rnd 17, see below.
Rnd 17: (or final rnd before sleeve ribbing) Work hdc in every st around until 2 sts rem in this rnd, 1 sc in next st, and in final st of the rnd sl st to join to previous rnd. Change to hook 3.5 mm.
Sleeve Ribbing
Rnd 1: Ch 1 and turn. Work dc into the next hdc and place SM in this first dc of the rnd. Work 1dc in each rem st around, until the final 2 sts. dc2tog, where last dc is worked into the base of the ch1 from the beginning of the round. Check that you have an even number of sts and adjust if necessary. Join with sl st to first dc of the rnd (marked).
Rnd 2: Ch 1 and turn. FPdc around the next dc, BPdc around next dc, FPdc around next dc, repeat this sequence to last st, continuing to alternate FPdc and BPdc around, finishing with BPdc. Join with sl st to first dc.
Rnd 3: Rep rnd 2 once more or until ribbing is desired length. Fasten off and cut yarn, leaving a tail long enough for weaving in.
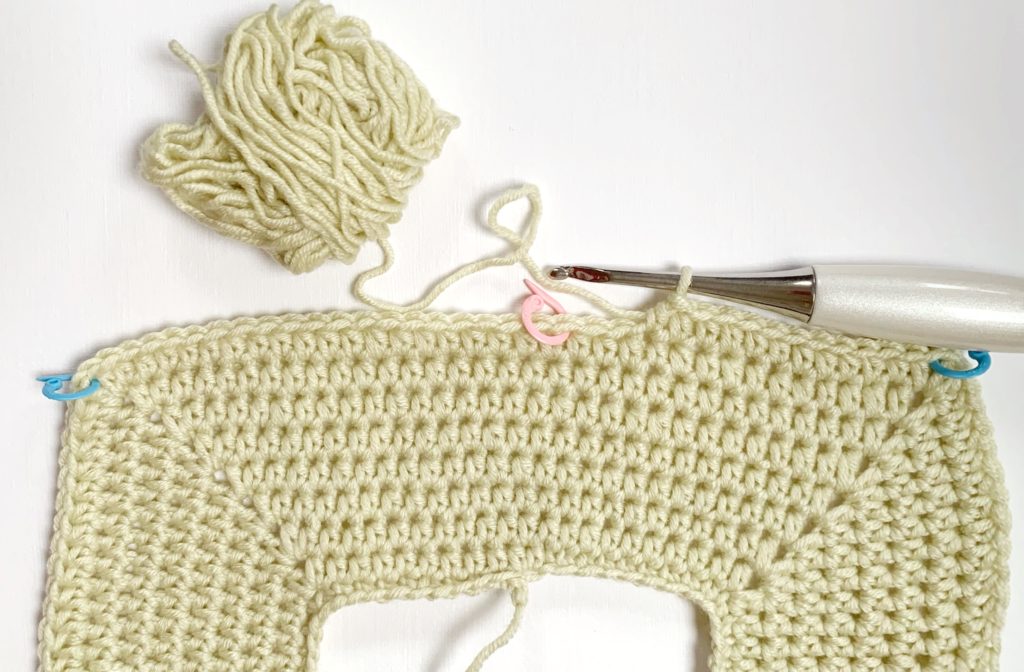
Note: For the newborn version, I experimented with a couple of stripes just before the wrist. Instructions for this are further down the page. Here it is as a work in progress:
Neck Ribbing
💡 Note: I often like to work the neck edging as one of the last steps of a sweater. By this point, I have a better feel for the stretchiness of the yarn and how it responds after being handled. I’m always aiming for the neck to go over baby’s head comfortably, whilst not being too loose when worn. So by working the arms and body first and then coming back to the neck later, I feel I’m in a much better position to make design choices about the number of rows of ribbing, what hook size to use, whether the neck needs a little tightening with 3 sts together in the corners, or whether just to leave it as is.
First: measure the neck circumference and compare this measurement to the circumference required. Bear in mind the amount of ‘give’ in the yarn and how easily it will stretch over baby’s head. If it’s about right, complete the ribbing using hook 4mm. If the neck has become slightly loose, consider using a 3.5 mm hook. If it’s significantly looser than required, consider working dc3tog at the neck corners to tighten a little, always ensuring it’s loose enough to be taken off and on without causing stress or discomfort. This is a matter of judgement. This following section assumes two further rows of dc ribbing.
Begin Neck Ribbing: Join yarn at CB. Work from WS as though you had just turned your work. Now dc in each st around, working into the sc created in the first round, so that each dc is directly above the first rnd of hdc. Check that you have an even number of stitches and adjust if necessary
Next Rnd: Ch 1 and turn. FPdc around the next dc, BPdc around next dc, FPdc around next dc, repeating this sequence to last st, continuing to alternate FPdc and BPdc all around, finishing with BPdc. Join with sl st to first dc. Fasten off and cut yarn, leaving a tail long enough for weaving in.
Finishing
Weave in all ends. I usually like to give the garment a gentle wash, and then check it over again for problems or loose ends before gifting.
Notes & Instructions for Approx 12 Months (4.5 mm hook)
Finished Measurements
| Neck circumference: | 38 cms | 15″ |
| Chest (laid flat) | 26.5 cms | 10.5″ |
| Armhole depth | 14 cms | 5.5″ |
| Sleeve length from underarm | 19 cms | 7.5″ |
| Garment length from top shoulder | 31.5 cms | 12.5″ |
| Garment length from neck | 28 cms | 11″ |
| All measurements are approximate |
Instructions
Instructions for the 12-month version are exactly as those for six months, except:
- We use primarily 4.5 mm hook, rather than 4 mm.
- Sleeve and bottom ribbing may be worked using hook 4 mm rather than the 4.5 mm hook used for the main body and sleeves, depending on yarn used.
- For bottom ribbing, I added three rows of FPdc and BPdc ribbing after the first row of dc.
- Sleeves: I added an additional five rounds to the sleeves (without any further decreases) before the ribbing.
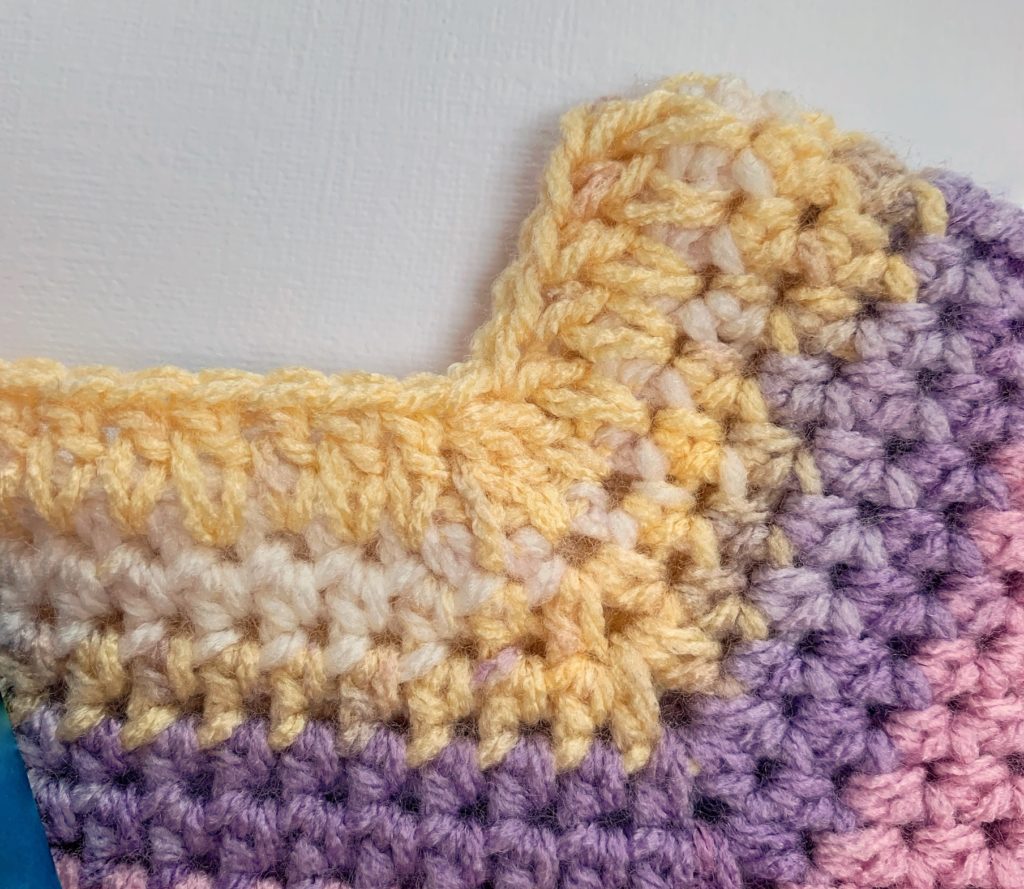
- Neck: the acrylic yarn I used for this sample was quite stretchy. So I simply added just one row of dc, working dc3tog in the corners (illustrated in an image above). I felt it then looked finished and worked well with the self-striping yarn.
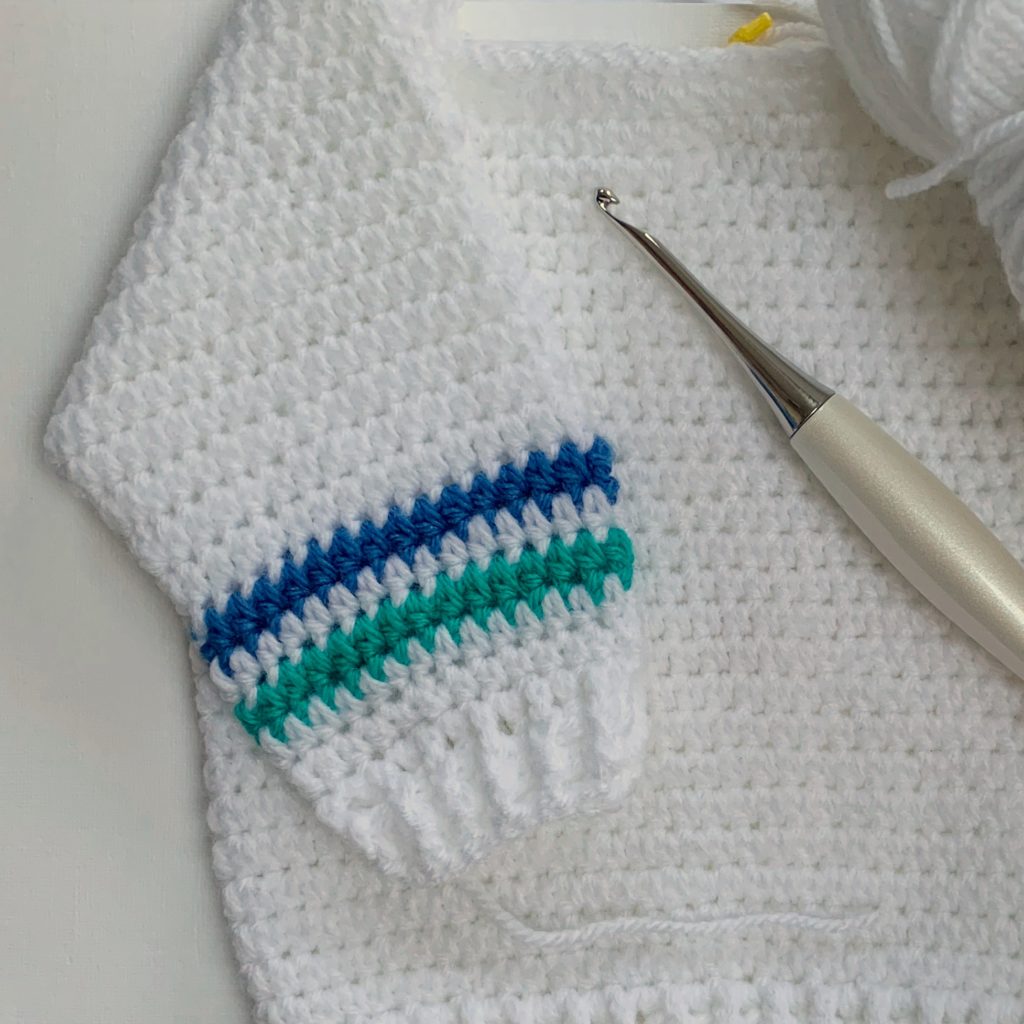
For Stripes on the Arms
- Place the stripes approximately 6-6.5 cms (about 2½”) before the finished arm length, so stop working in a spiral at this point by working sc then sl st at the centre point underneath the arm.
- Work one rnd of hdc in Contrast Colour 1, one rnd of hdc in your Main Colour, one rnd of hdc in your Contrast Colour 2.
- You may now resume the spiral technique to complete three further rnds in your Main Colour before beginning the sleeve ribbing.
- Be sure to continue working any decreases necessary.
Wrapping Up
I hope you’ve found these notes helpful, and I hope you enjoy making beautiful garments for people you love as much as I enjoy making them and sharing my experience with you.
I’m learning and developing my skills all the time. As I’m sharing my notes here for free, this pattern hasn’t been professionally tested; so if you find any errors here or have any thoughts or questions, please do drop me a note using the Contact Form. I’ll get back to you as soon as I can.
Thank you so much for dropping by 🙂
Debra
© 2020-22 B for Baby. All rights reserved. For terms of use, please see here.
Notes
| ↑i | If you’re not sure about the exact measurements of the child you’re making for, it’s always helpful to have a garment available that fits them well, so you can check it for size or, alternatively, you can refer to these standard industry measurements from the Craft Yarn Council as a guide. |
|---|